
Seriously! They are top-notch and really authentic, People! With Cinco De Mayo coming up, I thought it was only right to share the recipe with y’all.
Depending on the size of tortillas you use, this recipe makes about 24-36 chimichangas, which is why I usually reserve making these for parties or when we have company over. The leftovers are really good, too, and they can be frozen for up to two months in a Ziploc baggie.
More Delicious Mexican Food
- Cafe Rio Sweet Pork
- Instant Pot Refried Beans
- Zucchini Taco Skillet
- Honey Lime Chicken Enchiladas
- Restaurant Style Salsa
- Classic Taco Soup
I’ve made these so often I have it down to a science, but even if it’s your first time making something like this, don’t be intimidated. They are not complicated. They just take extra time because you have to fold and fry each one. But it is SOOO worth it!
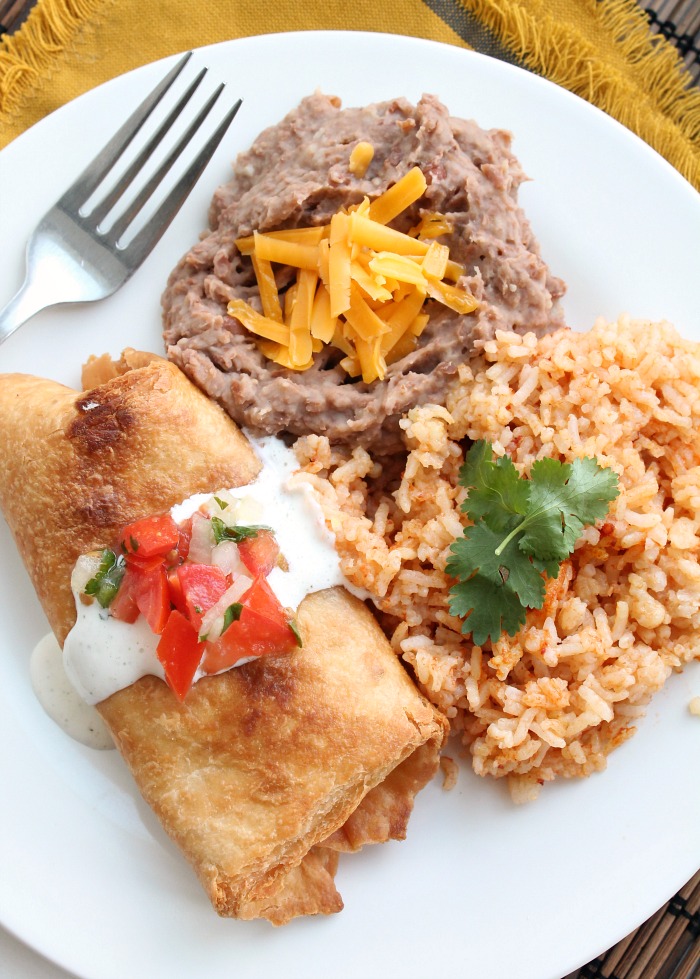
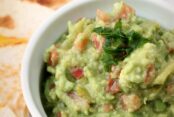
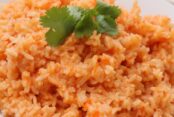
I always serve these with the same sides–Oven Baked Spanish Rice, Pico De Gallo, Guacamole, and Homemade Refried Beans. The Pico De Gallo can be made the day before to cut down on prep, the Spanish Rice bakes in the oven while you cook the chimichangas, and the homemade refried beans can be made on a different day and pulled out of the freezer.
I also love to serve my favorite Pina Coladas when we have chimichangas for parties.
how to make best ever chicken chimichanga recipe
- Heat oil in a large pan and add onions. Saute for 2 minutes. Add green chilies and saute for one more minute.
- Add flour, salt, cumin, and garlic powder and give it a quick stir or two. Add salsa and continue stirring.
- Next, add in chicken and juices. (If you do not have very much chicken juice, add a little chicken broth.) Continue cooking for 5 minutes or until mixture thickens. Take off the heat.
- Begin preparing chimichangas by first warming the tortillas in the microwave a little bit to help them fold easier.
- Start heating oil in a pan on medium-high heat while you are preparing the chimichangas. Fill pan of choice with about 1 1/2 inches of oil.
- Take tortillas out of the microwave. Add a scoop of the chicken mixture to the center of a tortilla (about 1/2 cup for large tortillas or 1/3 cup for regular-size tortillas).
- Once the scoop is in the center, fold two sides in and then fold the bottom piece over and then the top. Secure the chimichanga closed by using a toothpick as shown in the picture below.
- Once the oil is hot, begin frying and fry until both sides are golden brown. Flip them partway through cooking to get both sides golden brown.
- Remove from hot oil and place on paper towels to drain excess oil.
- Serve warm with all the fixings. YUM! Remind everyone to remove the toothpick before eating.
If you love Mexican food, or just want to impress someone, you must make these for them. You’re gonna love them and so will anyone you serve them to.
Tips for making the Best Ever Chicken Chimichanga Recipe
- The night before you plan on making the chimichangas, cook the 5 lbs of chicken in a 350-degree oven in a covered 9×13 pan for 1 1/2 hours or 2 if the meat is frozen. Sprinkle the chicken with lemon juice and a drizzle of olive oil and generously salt and pepper it. When the chicken is done cooking, shred it. Place the shredded chicken in the refrigerator until ready to use. I usually do this step so I don’t have to worry about it on the day we are having company or a party.
- For the green chili salsa, I use 2 (7 oz.) cans of Herdez Salsa Verde. I have also used 1 can plus one cup of regular salsa with great results.
- If you use large burrito-size tortillas, you will need 20-24. If you use regular-size tortillas, you will need 30-36. Do not use fajita-size tortillas. They do not work well.
- Before filling the tortillas, warm them a little bit in the microwave. I just leave them in the package and put them in for 30-45 seconds.
- When folding the chimichangas, place the meat mixture in the center of the tortilla, fold two sides in, and then fold one remaining side down and fold the last side over it. Secure with a toothpick. (See picture below.)

- Before frying the chimichangas, I fold them all and place them on a large cookie sheet.
- When frying the chimichangas, I use a two-quart saucepan that can fit 2-3 chimichangas at a time so that I don’t have to use so much oil.
- Instead of frying the chimichangas, bake them in a 350-degree oven for 25-30 minutes. They are ready to come of the oven when they are slightly brown. Before placing the chimichangas in the oven, brush them with canola oil or generously spray them with cooking spray.
- The leftover chimichangas can be frozen for up to two months in a Ziploc baggie.

Serve with


- 5 lbs cooked, shredded chicken and juices (Salt it during cooking.)
- 3 tbsp vegetable or canola oil
- 3 large onions, finely chopped
- 1 (4 oz.) can chopped green chilies
- 4 tbsp all-purpose flour
- 1 (16 oz.) bottle green chili salsa
- 2 tsp salt
- ¼ tsp garlic powder
- 1 tsp ground cumin
- Tortillas (20-24 large burrito-size OR 30-36 regular size)
- Toothpicks
- Oil for cooking (2-3 cups depending on size of pan)
- Heat oil in a large pan and add onions. Saute for 2 minutes. Add green chilies and saute for one more minute.
- Add flour, salt, cumin, and garlic powder and give it a quick stir or two. Add salsa and continue stirring.
- Next, add in chicken and juices. (If you do not have very much chicken juice, add a little chicken broth.) Continue cooking for 5 minutes or until mixture thickens. Take off the heat.
- Begin preparing chimichangas by first warming the tortillas in the microwave a little bit to help them fold easier.
- Start heating oil in a pan on medium-high heat while you are preparing the chimichangas. Fill pan of choice with about 1½ inches of oil.
- Take tortillas out of the microwave. Add a scoop of the chicken mixture to the center of a tortilla (about ½ cup for large tortillas or ⅓ cup for regular-size tortillas).
- Once the scoop is in the center, fold two sides in and then fold the bottom piece over and then the top. Secure the chimichanga closed by using a toothpick as shown in the picture above.
- Once the oil is hot, begin frying and fry until both sides are golden brown. Flip them partway through cooking to get both sides golden brown.
- Remove from hot oil and place on paper towels to drain excess oil.
- Serve warm with all the fixings. YUM! Remind everyone to remove the toothpick before eating.
- Leftovers can be stored in the fridge for up to 4 days or frozen for up to two months.
Other must make Mexican dishes


Looks delicious!
So leftovers can be frozen for two months, not two weeks, right? Also, what would they be like if I added cheese to the mixture? Do you ever add the refried beans in too?
Thank you and looking forward to making these!
Krystina B
Yes, as long as they are in an airtight container or freezer bag. Cheese would taste great in there. I have done beans, cheese and rice before wand my kids loved them too.
You mentioned you cooked your chicken the day before, what temperature do you have the oven set to?
I cook it in the oven at 350 degrees. I salt and pepper it and drizzle with a little olive oil and lemon juice. I cover it and bake it for about 2 hours, it usually needs a little longer if I am using frozen chicken. Hope that helps Mindi.
Can I. Are these the day before – including frying, then heat in the oven the next day. Or do you prepare the day before, and fry the day you have guests.
They won’t have the same crunch if you make them the day before, but they will still taste amazing!
Yummy stuff! But I froze my leftovers. How do you think the best way to reheat frozen ones are ?
We just reheat them in the microwave. They are not as crispy as the fresh fried ones, but the flavor is still delicious. I haven’t ever tried it but you could try reheating them in the oven or toaster oven.
These are so easy and good! I love the idea to freeze the leftover for later or easy lunch/dinner in the future! #Augustgiveaway
Awesome! Thanks Megan!
Have you ever baked them and if so what temp and how long. I made them last night and I liked them and so did my husband, which was a big surprise. Thanks for the recipe!
Yes! If you want to bake them you can spray them generously with cooking spray or brush them with canola oil. I think I did it at 350 degrees for 25-30 minutes. Just watch them, when they’re slightly brown they’re ready to come out.
These are so delicious. One of my favorite Mexican dishes on your menu! But actually, all the recipes I have ever made from you are delicious! Thanks for being so brilliant in the kitchen, so I can I joy the fruits of your labors!
Thanks Jamie! (Smooch) 🙂
Could I make these, and fill them, but freeze before frying? Then I would be able to pull out only what we will eat for a meal, thaw, and fry, so that way they are still nice and crunchy?
Hi Amanda, Yes, that should work fine, just make sure they have a chance to thaw completely so they will cook through. You might need to wrap them or put layers of wax paper or plastic wrap between them so they won’t stick together as they thaw.
So. Many. Onions. And yet, how are these so incredibly delicious? I love them!
LOL! One of the worlds greatest mysteries for sure!
These are so good!! Perfect crunch and flavor! Thanks Maria! #junegiveaway 🥰
You are telling the truth about these babies!! Absolutely delicious! I have a lot of your recipes filed away in my memory of the best meals ever but this one is a frontrunner! I admit they were and are a bit intimidating for me to make, bc you have it perfected! I love how food connects to memories and that is also another reason why I love all that you post! Because we both love food a lot, your recipes always bring back memories, and I love that❤️ #birthdaypost#happyblogaversary
I love this recipe. It has just great flavor. It’s so much cheaper than taking a big family to a restaurant. PARTY