Less Sugar Cooked Raspberry Jam Recipe
Prep time
Cook time
Total time
Delicious Raspberry Jam, which tastes fresh and delicious. This recipe uses less sugar than typical Raspberry Jam Recipes but does not compromise on flavor.
Author: SureJell Recipe in the Less or No Sugar Package
Recipe type: Jam/Condiment
Serves: 7-8 cups
Ingredients
- 10 cups of raspberries (This will make 5 cups once you crush them.)
- 1 box Sure-Jell No Sugar Needed Pectin (It is in a pink box. See picture above.)
- 2 tsp lemon juice
- 4 cups sugar
- 1 tsp butter or margarine
- 2-quart jars or 4 pint jars, clean and prepared
- Lids and rings for jars (Lids need to be heated before placing on top of filled jars.)
- Clean wet cloth (for wiping the rims of the jars)
Instructions
- Prepare the lids by placing them in a small pan on the stove and covering them with an inch of water. Wait to turn the burner on as instructed in Step 7.
- Next, measure the sugar into a medium-sized bowl and set aside. Measurements need to be EXACT when making jam.
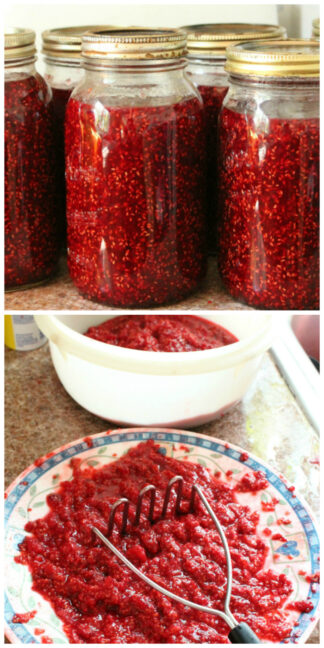
- Crush berries in a blender or with a potato smasher until completely crushed. Measure them 1 cup at a time into a large saucepan (at least a 4-quart) until you have measured all 5 cups.
- Next, add 2 tsp lemon juice and stir.
- Add ¼ cup of the sugar from the bowl you pre-measured, and also add the pectin package. Stir well.
- Turn the burner on to medium-high and stir continuously until the fruit mixture comes to a full boil. (A full boil is when boiling doesn't stop when you stir it.)
- Once the fruit mixture is boiling, now turn on the burner for the lids to bring the water to a boil. You want them to be hot and ready as soon as you pour the jam in and wipe the tops of the jars.
- Next, stir in the remaining pre-measured sugar to the fruit mixture and add the 1 tsp butter or margarine. Bring back to a full boil. Boil for exactly 1 min. (I have my timer preset, so all I have to do is press start.)
- When the full minute of boiling is over, remove from heat and pour into prepared jars.
- As soon as you get the jam into the prepared jars, have a clean, wet cloth ready to wipe the rims of the jars to make sure no sugar or jam is on them at all. Clean rims help guarantee that your bottles will seal.
- Next, use a fork or small tong to get the hot lid out of the small saucepan and place it on the clean rim. Quickly add the ring and screw it on tightly. If you need to move the jar from where it is, use a canning tong to carry it very carefully by the rim to a flat space. (I use my counter with a clean towel on it.)
- Let the jam sit there for at least 18-24 hours untouched or until it seals and is completely cool. Do not touch the top to see if it is sealed for at least 12 hours. You should hear a popping sound within 2 hours of the jam being in the jar. That sound means the jar has sealed.
- If for some reason your jars do not seal by following this method, you will need to process them. I have never not had one seal.
- Also, remember, if a jar does not seal and you don't want to process it, you can just keep it in your fridge for up to 4 weeks.
Recipe by Real Life Dinner at https://reallifedinner.com/less-sugar-cooked-raspberry-jam-recipe/