
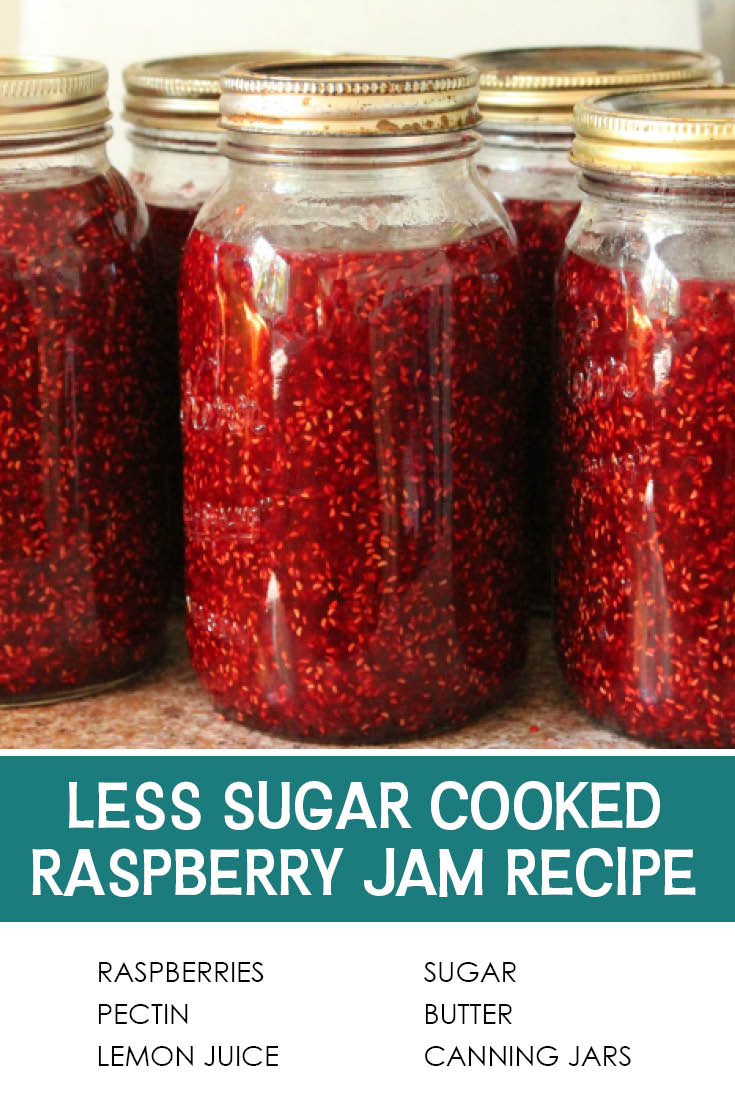
Homemade Low-Sugar Raspberry Jam
Is there anything better than raspberry jam? No. The answer is no. This Less Sugar Cooked Raspberry Jam Recipe is sure to make your PB&J do a happy dance all the way to your belly! If you love raspberries like I do, check out these delicious raspberry desserts next.
My aunt has an incredible raspberry patch that grows along a small stream at her house. It produces gallons and gallons of raspberries a year. She has always generously given lots of them to my mother, so I grew up eating delicious raspberry freezer jam and got addicted. Now I’m a bit of a jam snob.
Meanwhile, while I was growing up eating lots of delicious raspberry freezer jam, my husband was growing up 3 hours north of me, eating lots of raspberry cooked jam. His family lived near Bear Lake, which is famous for delicious raspberries, and his mom always picked or purchased flats of them each summer to make loads of cooked raspberry jam.
Love Berries? Try these Awesome Desserts:
- Brown Butter Raspberry Pie
- Homemade Danish Dessert
- Fresh Raspberry Lemon Tart Bars
- Blueberry Lemon Ricotta Bundt Cake
- Raspberry Shortcake Dessert
- Strawberry Rhubarb Crumble Pie
 Now that we’re married, I make both types to keep the nostalgia alive for both of us. I like freezer just a little bit better because it tastes so fresh, but this Less Sugar Cooked Raspberry Jam is a VERY close second. It’s awesome and with less sugar. Not only is it a little better for you, but without the extra sugar, the taste of the raspberries really comes shining through.
One of the reasons I love having cooked jam on hand–besides being my husband’s hero–is that it doesn’t take up freezer space, and is great for food storage.
When I first saw the No Sugar/Less Sugar packages of pectin, I thought, “Ew. These probably have a nasty aftertaste and use sugar substitutes.” I wasn’t entirely wrong. They do offer the option of using sugar substitutes, but they also have recipes for using less regular sugar. That is what I do, and we LOVE IT!

How to Make Less Sugar Cooked Raspberry Jam
- Prepare the lids by placing them in a small pan on the stove and covering them with an inch of water. Wait to turn the burner on as instructed in Step 7.
- Next, measure the sugar into a medium-sized bowl and set aside. Measurements need to be EXACT when making jam.
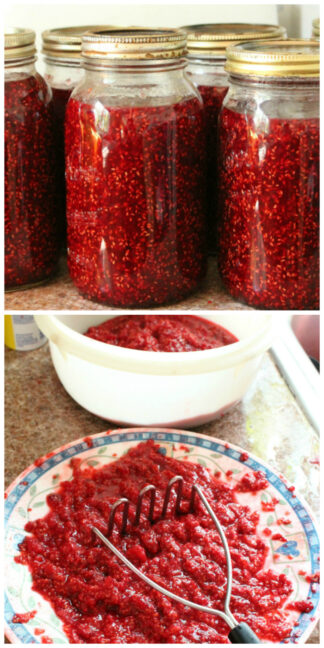
- Crush berries in a blender or with a potato smasher until completely crushed. Measure them 1 cup at a time into a large saucepan (at least a 4-quart) until you have measured all 5 cups.
- Next, add 2 tsp lemon juice and stir.
- Add 1/4 cup of the sugar from the bowl you pre-measured, and also add the pectin package. Stir well.
- Turn the burner on to medium-high and stir continuously until the fruit mixture comes to a full boil. (A full boil is when boiling doesn’t stop when you stir it.)
- Once the fruit mixture is boiling, now turn on the burner for the lids to bring the water to a boil. You want them to be hot and ready as soon as you pour the jam in and wipe the tops of the jars.
- Next, stir in the remaining pre-measured sugar to the fruit mixture and add the 1 tsp butter or margarine. Bring back to a full boil. Boil for exactly 1 min.
- When the full minute of boiling is over, remove from heat and pour into prepared jars.
- As soon as you get the jam into the prepared jars, have a clean, wet cloth ready to wipe the rims of the jars to make sure no sugar or jam is on them at all. Clean rims help guarantee that your bottles will seal.
- Next, use a fork or small tong to get the hot lid out of the small saucepan and place it on the clean rim. Quickly add the ring and screw it on tightly. If you need to move the jar from where it is, use a canning tong to carry it very carefully by the rim to a flat space. (I use my counter with a clean towel on it.)
- Let the jam sit there for at least 18-24 hours untouched or until it seals and is completely cool. Do not touch the top to see if it is sealed for at least 12 hours. You should hear a pop sound within 2 hours of the jam being in the jar. That sound means the jar has sealed.
- If for some reason your jars do not seal by following this method, you will need to process them. I have never not had one seal.

Sometimes people get discouraged at the idea of making cooked jam because they think they’ll have to process it. Well, take it from me, who took it from my mother-in-law, who has made cooked jam at least 100,000 times in her day. (Did I mention my husband is 1 of 10?) You do not have to process the jam. If you get it into the jars quickly while it is still really hot and get the lid and rim on securely, it will seal on its own. Yes, folks, on its own…no getting out all the crazy canning stuff. HALLELUJAH!
I do it this way all the time now.
Alright. Let’s get you started, whether you are a jam pro or this is your first time. You will love how simple this jam is to make, and you will especially love eating it and feeding it to your family, knowing it has less sugar than other jams.
Tips for Making Cooked Raspberry Jam
- Measurements need to be EXACT when making jam.
- Make sure to prepare the lids by placing them in a small pan on the stove and covering them with an inch of water. I turn the burner on for the lids when I add the sugar to the boiling fruit mixture. Then the lids will be hot and ready when the jam is finished.
- I have my timer preset to 1 minute, so all I have to do is press start when the fruit-sugar mixture comes to a boil.
- Have a clean, wet cloth ready to wipe the rims of the jars to make sure no sugar or jam is on them at all. Clean rims help guarantee that your bottles will seal.
- After you have placed the lids on and screwed the rings on, do not touch the top to see if it is sealed for at least 12 hours. You should hear a pop sound within 2 hours of the jam being in the jar. That sound means the jar has sealed.
- Remember, if a jar does not seal and you don’t want to process it, you can just keep it in your fridge for up to 4 weeks.

Chef’s Tools for Less Sugar Raspberry Jam:
- Sure-Jell No Sugar Needed Pectin
- Canning Jars
- Potato Masher
- Canning Funnels
- Measuring Cups
- Canning Kit
If you love Raspberry Jam, you'll love these...


- 10 cups of raspberries (This will make 5 cups once you crush them.)
- 1 box Sure-Jell No Sugar Needed Pectin (It is in a pink box. See picture above.)
- 2 tsp lemon juice
- 4 cups sugar
- 1 tsp butter or margarine
- 2-quart jars or 4 pint jars, clean and prepared
- Lids and rings for jars (Lids need to be heated before placing on top of filled jars.)
- Clean wet cloth (for wiping the rims of the jars)
- Prepare the lids by placing them in a small pan on the stove and covering them with an inch of water. Wait to turn the burner on as instructed in Step 7.
- Next, measure the sugar into a medium-sized bowl and set aside. Measurements need to be EXACT when making jam.
- Crush berries in a blender or with a potato smasher until completely crushed. Measure them 1 cup at a time into a large saucepan (at least a 4-quart) until you have measured all 5 cups.
- Next, add 2 tsp lemon juice and stir.
- Add ¼ cup of the sugar from the bowl you pre-measured, and also add the pectin package. Stir well.
- Turn the burner on to medium-high and stir continuously until the fruit mixture comes to a full boil. (A full boil is when boiling doesn't stop when you stir it.)
- Once the fruit mixture is boiling, now turn on the burner for the lids to bring the water to a boil. You want them to be hot and ready as soon as you pour the jam in and wipe the tops of the jars.
- Next, stir in the remaining pre-measured sugar to the fruit mixture and add the 1 tsp butter or margarine. Bring back to a full boil. Boil for exactly 1 min. (I have my timer preset, so all I have to do is press start.)
- When the full minute of boiling is over, remove from heat and pour into prepared jars.
- As soon as you get the jam into the prepared jars, have a clean, wet cloth ready to wipe the rims of the jars to make sure no sugar or jam is on them at all. Clean rims help guarantee that your bottles will seal.
- Next, use a fork or small tong to get the hot lid out of the small saucepan and place it on the clean rim. Quickly add the ring and screw it on tightly. If you need to move the jar from where it is, use a canning tong to carry it very carefully by the rim to a flat space. (I use my counter with a clean towel on it.)
- Let the jam sit there for at least 18-24 hours untouched or until it seals and is completely cool. Do not touch the top to see if it is sealed for at least 12 hours. You should hear a popping sound within 2 hours of the jam being in the jar. That sound means the jar has sealed.
- If for some reason your jars do not seal by following this method, you will need to process them. I have never not had one seal.
- Also, remember, if a jar does not seal and you don't want to process it, you can just keep it in your fridge for up to 4 weeks.
Serve Less Sugar Raspberry Jam with...


I just made this jam recipe but I can’t tell if my lids have sealed or not. I only heard one pop before I went to bed. Can you let me know?
I’m sorry i didn’t see this earlier, I unplugged for our summer break. I hope that the next morning they were all sealed for you. It can take up to 24 hours and it is important not to touch them to check until the Jam is cooled.
Im so excited! Made this for my first time ever last night! Also, first time canning. Went to bed, all lids sealed when i woke up this morning! Yay!
Now, do these need to be refrigerated still or can they be stored? If stored, how long can they be on the shelf? Thank you!!!
Hi Heather! I love hearing this. They can just be stored now. They can be stored for a LOOOOOOONG time, we’re talking years!
This method of sealing a jar is not approved by the FDA. You need to water bath can these for 10-15 minutes depending on the size of the jar. You do not have to have any special equipment. Simply put a clean dishtowel in the bottom of a tall pan fill with HOT water until the jar is covered by 2 inches of water. Hard boil for the appropriate any of time. You can Google USDA safe canning guide to see what is safe and what is not. Also you will want to store your jars with the outer ring OFF the jar that way if you do loose a seal you will know right away and can save by putting in the refrigerator.
Agree with Sherri – all long-term storage foods need to be hot water bath processed. It’s like saying “well nobody in my family died before we had to wear seatbelts” – anecdotal safety is not a substitute for best practices.
With that said, I do like whole berry jam better than seedless and am happy to find this recipe for ratios! Sending my kids out to pick today for jam this weekend.
I made this recipe and don’t like how tart it is, how can I make it sweeter?
Can I recook it just adding sugar? How much per cup?
Unfortunately there is nothing you can do. These recipes are developed to work with the exact amount of sugar and if that is altered it can mess up the jam consistency. If it is too tart for you maybe you can just add honey and stir it in to the individual jars when you are using them.
Leave out the lemon juice.
Anything special to do when using frozen raspberries?
Let them completely thaw first and then smash them before measuring.
Thank you for this excellent recipe, Maria 🙂
I just made it .. with wild Minnesota raspberries and a handful of wild blueberries .. and half the real sugar.
Deeeelicious!
The surejell recipe measurements for the fruit online were different from my saved instructions from past boxes.
So I went with a “real person” recipe 🙂
Thanks again, and God’s blessings!
Yay! I am so glad you found this recipe! I bet it is absolutely delicious with your wild Minnesota Raspberries and blueberries. YUM!!!!