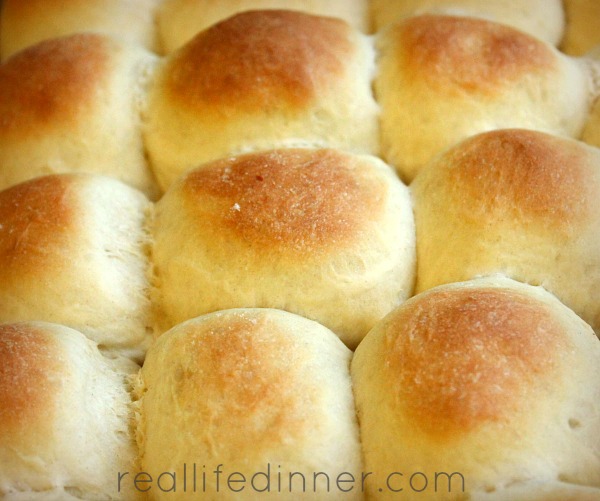
Lunch Lady Rolls Made without a Mixer
I saw this recipe for Lunch Lady Cafeteria Rolls on Pinterest last week and just had to try it. There wasn’t a whole lot I loved about school lunch, but I do remember liking the rolls.
I was so happy with the way these rolls turned out. I made two small changes. One wasn’t even on purpose, but it simplified the process. That is what I call a happy accident!
I made the Lunch Lady Cafeteria Rolls again today and took a picture of each step. If you are an old pro at making rolls, just skip down to the bottom for the entire recipe. Otherwise, follow me. Once you see the steps, you will be a pro!
Serving Turkey for Thanksgiving this year?
Click here for simple tips to make it awesome!
P.S. When I made these rolls last time, I used half of the dough to make cinnamon rolls!!! TURNED OUT AMAZING!!!!!!
step-by-step instructions for how to make lunch lady cafeteria Rolls
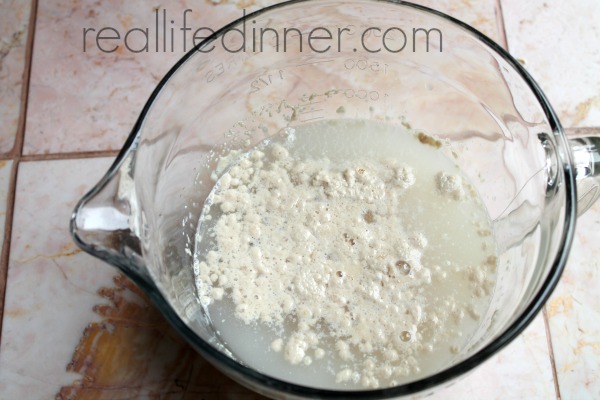
- Add yeast and 1 Tbsp sugar to warm water and let sit for 3-5 minutes.
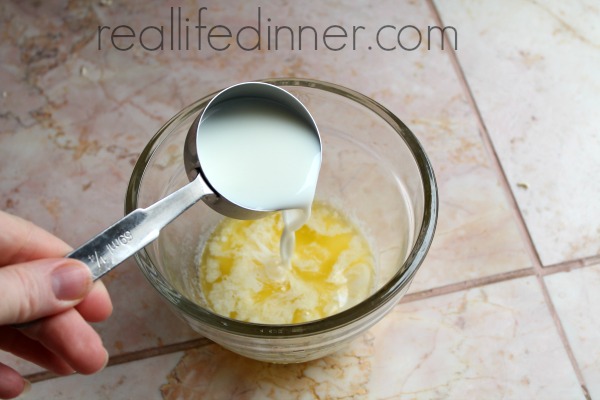
- Melt butter in microwave, and then add the milk to help the butter cool down. (If you add the butter to the yeast while it is still hot, it could kill the yeast.) **The original recipe says to add the melted butter after dough has risen for the first time and to knead it into the dough. That just seems like it would be a mess. I accidentally put it in with the yeast mixture the first time I made them, and they turned out so great! I don’t think it is worth the mess of adding it later after the dough has risen, but you can try it, if you want.

- Slightly beat the eggs.
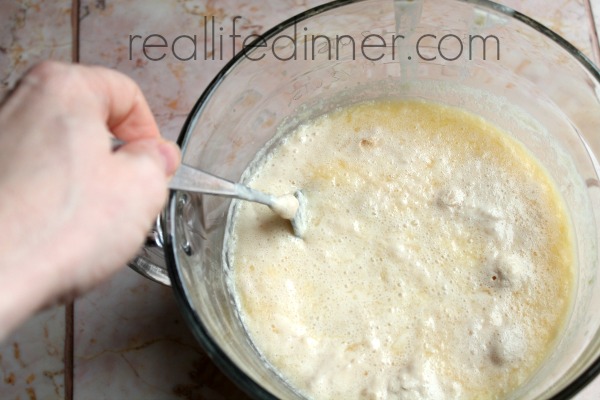
- Add melted butter (cooled), milk, eggs and salt to yeast mixture. Stir until it is well combined. (Original recipe calls for 1 Tbsp of salt. I thought it needed just a little more, so I threw in another 1/4 tsp.) The mixture will look something like the picture above.
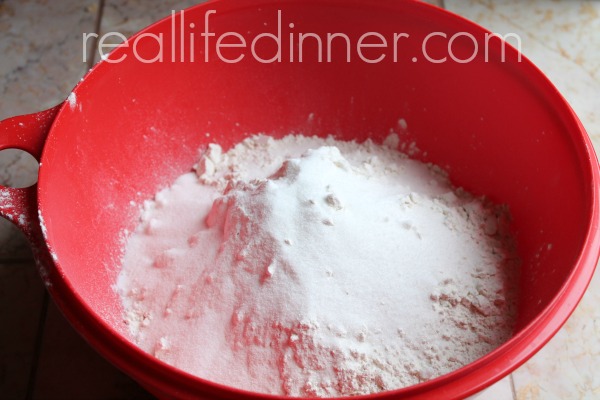
- In a large bowl combine flour and sugar. Stir until combined.
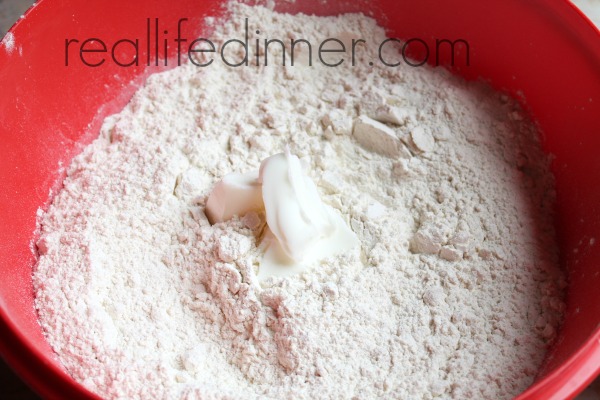
- Add shortening to mixture.

- Using your hand, crumble shortening into flour until it is barely noticeable.
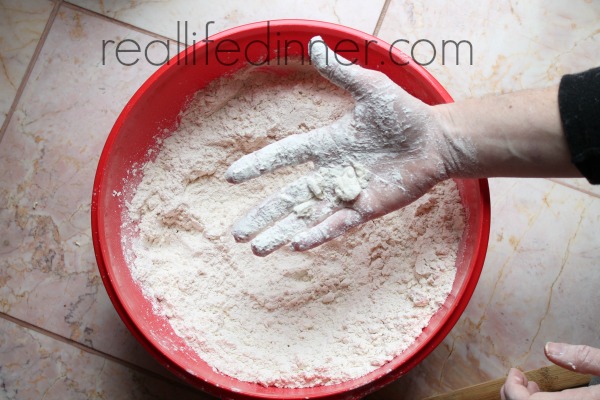
- Search for lumps until you get them all.

- Pour liquid yeast mixture into flour mixture.

- Using a large wooden spoon, stir until well combined.

- When dough starts to come together, ditch the spoon.
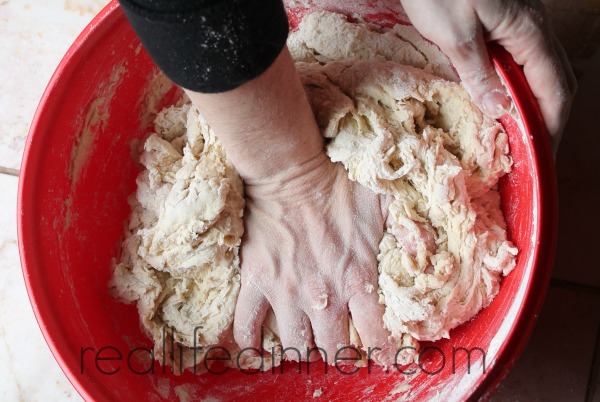
- Using your hand, knead the dough for approx. 2 minutes. Add a little more flour, if dough is too sticky to work with.

- It will come together into a nice ball. Cover dough and place in a warm area for up to two hours or until dough doubles in size. (I put mine in my oven. While I mix the dough, I heat the oven to 195 degrees. Then, I turn the oven off right before I put the covered dough in it. This step cuts back on time dramatically. Dough will be doubled in 20-30 minutes.)

- Dough will look something like the picture above. (I forgot about mine, and it rose for about 1 1/2 hours.) It was fine. You can let it rise for up to 2 hours, if you want to.

- After dough has doubled in size, punch it down and knead with your hands one more time for 2 minutes. If dough is a bit sticky, sprinkle it with flour as needed. At this point, preheat oven to 400 degrees.

- After the 2 minutes of kneading are up, you are ready to form the dough into rolls. The original recipe says you can roll it out and cut it into 2×1 rectangles and form them into balls. TOO MUCH EFFORT! Just rip off a piece the size of a large apricot, and follow the above steps 1-4 to form it into a perfect ball. Dip your fingers in flour occasionally to keep dough from sticking to your hands.
-
-
-
- Step 1: Begin as if you are turning the dough inside out.
- Step 2: Using your other hand, come down around the dough, pushing it into a ball-like shape.
- Step 3: Turn over and pinch bottom to finish making it into a ball.
- Step 4: Place seam side down in a greased 9×13 pan.
-
-
-
- When dough is formed into rolls and placed on pans, cover and allow to rise until almost doubled again. I put my pans on top of the oven while it is preheating, and this step usually only takes 15-20 minutes. Bake rolls at 400 degrees for 12-14 minutes.
Not so bad, right?! Great job! Enjoy your yummy rolls!
More Homemade Rolls Recipes
- Mom’s Best Dinner Rolls
- Lion House Rolls
- Ninety Minute Rolls
- One Hour Dinner Rolls
- Easy Homemade Hard Rolls
- Crescent Shaped Rolls
Tips for making Lunch Lady Cafeteria Rolls
- Make sure the melted butter has cooled before adding it to the yeast mixture. The heat can kill the yeast.
- Mix shortening into flour until it is barely noticeable.
- For a faster first rise of the dough, 1) Heat oven to 195 degrees while mixing the dough; 2) Turn off oven right before putting covered dough in it. Dough doubles in 20-30 minutes.
- Follow the four steps in the numbered collage picture above to shape the dough into balls.
- While the oven is preheating to 400 degrees, place covered pans with rolled dough balls on top of the stove/oven for a quicker rise before baking.
- These rolls can be frozen in dough form. Roll them into balls and freeze them individually on a cookie sheet before putting them in a freezer-safe container. When ready to use, take out of freezer and give them time to rise as they thaw out. They can also be frozen after they are cooked and cooled. So handy to be able to pull out of the freezer on busy days!
- If you want to, you can use this dough for great cinnamon rolls. Click here for the recipe.
Baker’s Tools for Making Lunch Lady Rolls

Dip Lunch Lady Rolls in these Soups


- 3 cups warm water
- 2 tbsp + 1½ tsp yeast
- 1 tbsp sugar
- 1 /4 cup butter, melted
- ¼ cup milk
- 2 eggs, slightly beaten
- 1 Tbsp + ¼ tsp salt
- 10 cups all-purpose flour
- ⅔ cup sugar
- ¼ cup shortening
- Add yeast and sugar to warm water and let sit for 3-5 minutes.
- Add melted butter (cooled), milk, eggs and salt to yeast mixture.
- In a large bowl, combine flour and sugar. Stir until combined.
- Using your hand, crumble shortening into flour until it is barely noticeable.
- Pour liquid yeast mixture into flour mixture.
- Using a large wooden spoon, stir until well combined.
- When dough starts to come together, ditch the spoon and use your hand to knead the dough for approx. 2 minutes until it comes together in a nice ball.
- Cover dough and place in a warm area until it doubles in size. (I do this in my oven. While I mix the dough, I heat the oven to 195 degrees. Then, I turn the oven off right before I put the covered dough in it. This step cuts back on time dramatically. Dough will be doubled in 20-30 minutes.)
- After dough has doubled in size, punch it down and knead with your hands one more time for 2 minutes. If dough is a bit sticky, sprinkle with flour as needed.
- Spray baking pans or sheets with cooking spray.
- Preheat oven to 400 degrees.
- Form dough into 2-inch balls and place onto cookie/baking sheets or in 9x13 pans. If you want pull apart rolls, place them close together in 9x13 pans. Otherwise, place them at least 1-2 inches apart on a cookie/baking sheet.
- Next, cover and allow formed dough to rise until almost doubled again. Placing the pans on top of the oven while it is preheating will speed the process up, taking usually only 15-20 minutes to double in size.
- Bake at 400 degrees for 12-14 minutes.
Rolls go great with these...


Mmmm, I’m a sucker for a good roll, and these look amazing. Yum!
Excellent dinner rolls with my chicken and noodles on a cold Kansas City night…. great food to watch the replay of the KC Chiefs Super Bowl!!!!
Awesome! Love hearing that Chris!
Can I substitute butter flavor CRISCOfor the shortening ?
Yes
Can I use veg. Oil instead of shortening
Yes or butter would work too.
How would you make these in a bread machine
Hi Leean, I am so sorry, I have never had a bread machine so I don’t know the answer to that question. I am guessing the recipe would need to be at least halved or even fourth depending on the size of your bread machine.
Hi,
I would like to make these for the holidays, can you make them a day before? If so how do you store them, and reheat them?
Yes you can. I let them cool completely and then I put them in single layers (flat) in gallon size ziploc bags. I usually don’t reheat them but if you want to you can either stick them in a 225 oven for a few minutes of microwave them for about 30-40 seconds.
can u tell me the sodium content
Hi Karen, I’m sorry, I don’t know the sodium content.
1 Tbsp + ¼ tsp salt. So…. it’s a math problem at that point.
Which type of yeast is used in this recipe?
Hi, Denise. You can use active dry yeast or instant. If using instant yeast, it will rise faster than dry yeast, so keep an eye on the dough so it doesn’t rise too much.
This is the best yeast roll..my husband made the statement “I would give anything to find someone to make rolls like the lunchroom ladies”.we are seventy years old, been married fifty years, needless to say over these fifty years I’ve tried fifty recipes for rolls some were good, not great, but I made that it a few times before moving on. Last week I Googled Cafeteria lady rolls and low and behold this recipe was this recipe was the first to pot up ,in six days we’ve made this three times.been We’ve been on a very low Carb diet for four years, no bread,after the first batch of these rolls we ate nothing but rolls for three days we ate nothing but rolls…
Wow Delane! I love it! You just made my day! I am so happy you found recipe and that you and your husband love it so much! That is awesome!
Hi Delane ! I am 71; and we had the biggest, baddest rolls in high school in southern CA. They were 50 cents ! And we were blissfully unaware, especially about nutrition or health, so that was my lunch many times.
Which amount of sugar is added to the yeast mixture??
Hi Liz, One tablespoon is added to the yeast mixture.
That is the best story ever!😊
I have my dough in the oven for rising. I’m wondering why my dough was so sticky to start out with. I had to add probably another 3/4 c of flour to get it to a ball. It’s been way more humid here than usual, could that be it? Also, just a hint, I turn my oven light on before I start and it warms my oven enough for a faster rise. I leave it on while the dough is in there!
Hi Shirley, yes, definitely could be because of the humidity. Bread is such a funny thing that way. What a great idea with the oven light! I am totally going to try that when I have an oven with a light again. We live in Germany right now and our oven doesn’t have a light. It’s so annoying! 🙂
IveI’used this recipe at the holidays for many years.. it is super easy with remarkable results. This year I will make the dough in advance and freeze for travel.
Can’t wait to make these rolls!!
YAY! Hope you like them!
I have made these rolls 4 times between October-December and now my son wants the recipe and wants to make them as well…the last batch I brushed the tops with honey butter after they were done baking, they went very quickly and honestly I’m ready to do another batch just to give to my clients. ENJOY THIS RECIPE❤️
Thanks, Annette! The honey butter sounds delicious.
My family loves this recipe. It brought back memories of my early childhood school lunch rolls.
Thank you for sharing this recipe with all of us. God bless you!
I am so glad they like them and that it brings back memories for you! God bless you too!
I’ve just spent an afternoon in my happy place – in the kitchen baking! I decided to give these a whirl and see how they came out. We don’t have cafeteria lunches at schools in New Zealand…but it doesn’t take much imagination to work out what they are. So….I halved the recipe and threw it in my breadmaker while I got on with my baking. It produced the most incredibly soft dough…and then I turned them into cinnamon rolls. They have just come out of the oven and oh my! The house smells incredible…they look delicious…I can hardly wait for them to cool down so I can frost them and eat them. The idea was to freeze them down for the school lunchboxes….not sure if that’s going to happen!!
I am so glad!!! I love having days like that! Thank you so much for taking time to come and tell me about your baking! I am so glad you liked the recipe!
Gluten free flour?
I haven’t ever tried it, but I think they would still turn out well.
Where can I find this recipe?!?
It should be on this link. You may need to click the red button that says “read more” if you aren’t seeing the recipe.
Hi . I am trying the rolls 1st time . do I butter the tops or egg wash them ?
Butter the top after they come out of the oven. 🙂
Awesome recipe and easy to make.
Thank you! So glad you liked the rolls!
This appears to be easy and straight forward, so it’s easy to make and pretty fast. Thank you.
Wonderful recipe!
Thank you Teresa!
Do you prefer kneading by hand rather than a stand mixer?
Depends on my mood. I use my mixer a lot but sometimes I just really like doing it by hand. Therapeutic. 🙂 How about you?
So I recently had shoulder surgery and would
Like to try these in my stand mixer what options would I change how would I mix these
No need to change anything, Just the kneading time can be cut in half.
I make these all the time! So delicious! Have you ever used this recipe for pizza crust?!
I haven’t. I have a really simple pizza dough recipe that I love and use all the time. It is on the blog under Pizza dough.
If I bake first and then freeze, do I rebate after thawing?
NO, you could warm them in the microwave or oven for a bit if you want to serve them warm, but no need. Once they are thawed they are ready to eat.
Re your lunch lady rolls. Didn’t find Answer in comments: Have made these several times but never tried refrigerating dough overnight. Big dinner coming up, lots of prep and trying to get as much done the night before. Have you had successful rise ? Have had some recipes that did not fare well doing so (wheats especially) thank you!
Hi Toni, I haven’t tried this over night in the fridge. When I have big dinners I try to make the rolls ahead of time and freeze them and then get them out a about 5 hours before I need to serve them.
Nothing beats homemade rolls!
Do you need to grease or spray the cookie sheet before placing the dough balls on it?
yes Ida. 🙂
I made a half batch of these the other day and they turned out fabulously! Thank you so much for the recipe, and the tips to make everything come together a little quicker. Homemade rolls are great, but even better when you can throw them togrther and have them ready to eat in about an hour.
Hi Joy,
Yeah! So glad you liked it, it is such a great recipe. You should totally try making cinnamon rolls with the dough next time….SOOOOO yummy! Thanks for taking time to come back and let me know you liked the recipe!
Maria
Hi Maria, I just have one question (since I am just now finding my joy of baking). The flour used in these rolls…is it all purpose or self rising? Thanks.
Hi Kim,
All purpose…and so glad you are finding your joy of baking. 🙂
Maria
Maria, Did you use rapid rise yeast or regular yeast?
Regular
These were a big hit at Thanksgivng! Thank you for sharing!
I tried them in my bread machine. Just go through the dough stage, let rest for 10 minutes, and then allow to rise again. They come out perfectly!
In what order did you add ingredients in your bread machine?
I’ve never done it in my bread machine. I actually don’t have any experience using a bread machine. Sorry I can’t be of more help.
Depends on your bread machine. Some are wet to dry and some are dry to wet. Mine is wet to dry with yeast last. Just look at a bread recipe you have had success with and put the ingredients in in that order. Vague, I know, but I hope it helps.
You usually add liquid, then shortening and etc. Adding your yeast last according to my bread machine. But about the adding flour to liquid , she should really emphasize, to have extra flour handy. I did not and I could hardly get my hands free to get the canister. I learned about that. It was really funny Later. Enjoy the day.
Liquid first, flour sugar and other ingredients, yeast last
Can I sub rapid yeast for active yeast? If so, how much? Thank you
Yes you can, the only difference is you don’t need to let the yeast sit in the water mixture for five minutes before adding the other ingredients. Does that make sense?
…so would I half ALL ingredients to make half the recipe
Hi Valerie, Yes, you would half everything.
What is the recipe for a half batch please
Maria makes a full batch of the dough, and then splits the dough in half. If you don’t want to bake a full batch, these rolls can be frozen in dough form. Roll them into balls and freeze them individually on a cookie sheet before putting them in a freezer-safe container. When ready to use, take out of freezer and give them time to rise as they thaw out. They can also be frozen after they are cooked and cooled.
These are soooo amazing!!! I used 6 cups of unbleached flour and 4 cups of whole wheat and they turned out so good. I’ll be making these again and again… Thank you for sharing this recipe. (This is the first time I have ever commented on a recipe.)
Maureen!
You are too cute! I am so glad this recipe spoke to you enough to get you to leave a comment…..And I am so glad you like the rolls. I love them too. Next you have got to try them as cinnamon rolls. THE BEST!!!
Maria
What do you cover them with during rising ? Plastic wrap or cloth dish towel?
I’ve done both. I prefer plastic wrap that has been sprayed lightly with cooking spray.
Great idea! I am a cafeteria lady and have made these rolls at schools many times. We’ve stopped making them as well as the chocolate chip cookies. (New nutritional guidelines and time I think). Unfortunate because we also began making them with whole grain flour and they were still so soft and tasty. This original and your recipes are spot on and all advice Maria has offered is authentic. So nice of ypu both to share. This dough is also excellent with a slice of american cheese folded several times then inserted as well as mini smoked sausages sealed in well before baking. Those are called Cheese zombies. Velveeta works also ?
That totally makes me sad that lunch ladies aren’t able to make rolls anymore. It seems like very little (at my kids school, at least) is made on sight or from scratch anymore. 🙁 Thanks for the idea to try Cheese Zombies, I am sure my kids would love them.
I am really excited to try the version with the whole wheat. We have so many uncommon grains here in Switzerland that I haven’t ever heard of. One is called Dinkel. Have you ever heard of it? I know it is supposed to be one of the ancient grains that haven’t been modified. It tastes amazing. I love baking bread and rolls more than any other baking process. There is something magical that happens when you feel and smell the dough. It is the best and reminds me of coming home from school and smelling the fresh rye bread that my Daddy made for us. Funny thing is, none of us wanted the middle slices and we all wanted ends so Daddy would cut it in half lengthwise and then in 1/2. We would top it with our homemade fresh butter and honey! OKAY, that got me to salivate a bit too much. Off I go to satisfy my craving with this amazing recipe. THANKS FOR SHARING!
I’ve never heard of Dinkel. How fun to get to try new things. I hope it turned out well for you.
#junegiveaway
Wonderful, delicious, easy….mmmmm! Thank you for sharing this recipe! I have shared your website with my FB friends so that they can join in the yeasty incredibleness! =D
I was wondering about stuffing these? The rolls from the cafeteria are also one of the things I liked best as well…however on special days the cafeteria produced their normal rolls as a breakfast roll! Amazing! They were stuffed with sausage (thinks smokies or cut up breakfast links) and cheese, so good! Any ideas or tips?
You could give it a try I would just make sure to roll out a roll sized piece to about 1/4-1/2 inch put filling in middle and pinch it shut, then watch closely as it cooks. Good luck!
I’m a cook st school and we use our roll dough to make the pepperoni rolls and pig in the blankets too. Pepperoni rolls you just add mozzarella cheese and pepperoni and roll it up. Pig in blanket we just wrap the dough around the hot dog. Couple of the kids favorites❤️ Hopefully this helps you out
Thank you Kim! My kids would love both of those.
Check out Cydney’s post a few comments above yours. She mentions stuffing them toward the end of her note. ?
Have you frozen any of the dough and made rolls later? How did they turn out?
Hi Tracy, I have never frozen the dough, but I often cook the whole batch and freeze the rols to pull out for later meals.
Maria
I made these last night. They were good, but didn’t turn out quite like I expected – in particular, they weren’t as fluffy and didn’t rise as much as they should have. I am not very experienced with yeast dough – can you think of anything I might have done wrong or could do to fix it?
Hi Emerald,
How long you let things raise is sometimes not as important as letting it raise to a certain size. Depending on water temp, or temp in your house, the dough may need to raise longer then recommended to double in size. If you let it double and then give the formed dough balls time to rise before cooking, they should come out nice and fluffy.
Hope that helps,
Maria
Also, I’ve had that problem if my yeast is too old. It won’t last forever, even if you keep it in the freezer.
Sometimes if the yeast is not fresh your dough will not rise as much as you would think it should. Good yeast will dissolve in liquid and look foamy on top after it sets 5 to 10 minutes. If it doesn’t that is a sign that it is too old.
Did you use plain flour or self rising?
Hi Tracy,
I use regular all purpose flour and sometimes I add a couple cups of wheat flour.
Maria
can I use self rising flour? If so, how much salt would I use?
Hi Nancy,
I haven’t ever used self rising flour so I can’t say for sure. You could try googling it to see if there is a conversion chart for salt adaptation out there anywhere. Good Luck!
Maria
Hey, guys — yes, self-rising flour can be used in recipes which call for APF, but the reverse isn’t always true — usually in THAT case, you have to add baking powder and salt (which are already included in SRF).
FYI. Enjoy!
Lynn
I wonder how they would work with whole wheat flour ?
Hi Geneob,
I have made them using almost half whole wheat flour. They turn out well, but for the genuine copycat flavor of the good old school lunch rolls you will want to stick with all white or just a cup or so of whole wheat.
Maria
We stuff the rolls with taco meat and cheese in a ice cream scoop stretch the rolls around the meat let it rise cook for 8-12 minutes great with liquid cheese on top taco burgers
Hi Kelly,
Sounds Awesome! My husband keeps asking me to make ham cheese roll-ups with the dough too. He says at his school they did that and it was his favorite. Thanks for the great idea, can’t wait to try it.
Maria
Greased or ungreased pan?
greased
Thank you…..
🙂
I have made this recipe several times and love it. Before my dad passed away, he had been in a hospital for several days and couldn’t keep anything down. I made him some rolls and soup and he loved them he kept getting little bits. I don’t think he touched the soup. But, I know he enjoyed your rolls. Thank you and I truly enjoyed sharing my memories of my dad with you.
Thank you so much for sharing that Linda! I love how food can be such a meaningful part of significant parts of our lives. I’m so sorry to hear of your father’s passing, sending prayers and love to you and your family. xo Maria
Can we stand up to make them? My knees aren’t so good at squatting anymore…..sorry couldn’t resist. The rolls look great, I’ll have to give them a try. And I appreciate the effort to get good pixs 🙂
Haha Susan! Yes, making them standing up will still yield amazing rolls. 🙂
Can the dough be made and kept in the frig. and baked the next day?
If you choose to do it that way. Form it into the rolls and cover it with plastic wrap and immediately put it in the fridge. Don’t let them start to raise before putting them in the fridge. They will raise in the fridge.
You stated that you placed the rolls on top of oven while preheating@ 400degrees. Do you mean top shelf of inside the oven or on top of cook stove above the oven. If it is on top of cook stove what is a good tip to help them rise quickly since I only have built in’s? Can’t wait to try these.
Hi Nelda, I was talking about on top of the stove top while it is preheating, but another tip I use all the time is to heat your oven to 200 degrees while you are mixing up the dough. Then turn off the oven and place the bowl (don’t use a metal one) in the warm oven (covered) for about 30 minutes or until the dough doubles. Good luck! Maria
First time making rolls , wanted some for lunch tomorrow… Got through mixing and put in warmed oven , now reading where you said don’t use a metal bowl…..too late. Well we’ll see how they turn out. Can’t wait for instructions from wife , she previously worked in a lunchroom.
Hope they turn out better than her’s .
I’ve done it with a metal bowl on occasion but I put a hot pad under the bowl so it won’t touch the metal wire rack which will transfer direct heat to the bowl. Hopefully it still worked out for you. Way to go making rolls for the first time. 🙂
Remember the homemade rolls at school so well! I am going to try this but don’t need that many rolls. Thinking about using half the recipe for cinnamon rolls. How do you make the cinnamon rolls?
They are so yummy and make great cinnamon rolls. There is a link on the post that will direct you to the cinnamon roll recipe.
When halving the recipe, do you half all ingredients including the yeast mixture?
Hi Robyn, yes, I do half everything.
Do you use active dry yeast or fast rising? I’ve not had much luck with roll making so I hope this is the one!
Thanks!
Lori
Hi Lori, I use active dry yeast. You are going to feel like a pro making these, just make sure to let them double when they rise and you will be golden!
Hi. . . just wondering if I make this and want to freeze a batch for holiday dinners, should I cut down the cook time, and freeze them not quite done for finishing later, or fully cook before freezing, or just freeze the dough in balls without cooking at all?
thanks
I have never tried it that way. I usually just cook them completely and heat them for 2-3 minutes in the oven before serving.
I noticed on the ingredients
There r 2 different measurements of sugar
At the beginning & on the end of the recipe when u add shortening add the additional sugar?
Yes, the first little bit is to put in with the yeast to help it grow faster.
Oh my goodness! These rolls look so good! The last time I had yeast rolls was in the cafeteria my Senior year which was over 40 years ago!!! I haven’t eaten any yeast rolls since that were as good as the cafeteria made. Once I get my oven repaired, this will be once of the first recipes I try. DID I MISS THE RECIPE FOR THE CINNAMON ROLL VERISION???
Here you go. https://reallifedinner.com/lunch-lady-cafeteria-cinnamon-rolls-tmh/
Can I use bread flour for this recipe?
I’ve never tried it, but it should work fine, the rolls will most likely be extra fluffy and light.
I also remember the lunch rolls we had at school. We had western hash with rolls and we called them orange rolls. They had an orange tint to them and I’ve never figured it out. They were delicious though. I must try this recipe to go along with my western hash. That and a salad is a great meal.
What is Western Hash?
Any yeast bread can be made and refrigerated before the first rising period. It rises in the refrigerator overnight. Next day (or up to 5 days) remove how much you want to use. Shape your rolls, let them rise until double, and then bake.
You can also freeze shaped rolls after the first rising period . It is best to let them freeze on a cookie sheet then when frozen put them in a freezer bag. Remove the number you want to cook and let them thaw and rise and then cook as usual.
I’m not an experienced baker – but my mother was a master ! I am confused about putting the dough into the refrigerator to rise? I thought the yeast needed the heat then rise ? Thanks for the clarification.
HI Dianne,
Letting it rise in the fridge slows down the process so the rolls can be cooked later, if that is what you desire.
My Aunt Bernice was the Head Cook for our school district (5 high schools in Whittier, CA) in the ’70’s; she served her rolls with honey butter, using two of the ‘commodity foods’ provided by the U.S. government back then. They were to die for!!
Moving soon into a house with a real kitchen! Can’t wait to get started on baking your tempting recipes! Thanks for the step by step instructions!
i have a stand mixer with a dough hook. Is there any way to use it to make this even easier?
You can use it in place of where I instruct you to hand knead. Just cut the time in half
Anyone try these at high altitude and have to make adjustments?
I tried out the rolls tonight and they are definitely yummy! I love to cook, but not much of a baker. While the rolls were light and fluffy, I would have liked them to have more of a flaky/layered like consistency … Instead mine were closer to a biscuit-like feel. Was it something I did wrong; or is this the texture they have when you make them? And, I love a buttery & slightly saltier roll … Any suggestions on what I should do to change it!?
You might need to let them raise a little longer. You could add a little more salt and brush the tops with lots of butter when they come out.
I am 71 years old ,and have made rolls in the past but I am so glad my cousin posted this on my face book page, I will be trying these in the morning and will be making them for Thanksgiving .
My children have and myself have thought many times about these rolls and I am so excited tonight thank you so much for posting this !!!!
Can you use bread flour
Yes, it would just make them even more fluffy, chewy and delicious!
Hi! What do you use to cover the dough while it rises in the oven (Saran Wrap, a kitchen towel, etc)
I want to make these for the holidays. Thank you for posting.
Hi Dorothy,
I just use a dish towel or an apron to cover it when I put it in the oven. If I use my big plastic bowl I put a dish towel or a big hot pad under it to make sure it won’t melt or warp my bowl. 🙂
Can you tell me *which* yeast to buy? There are a few different kinds. Thank you!
Hi Dan’l,
I just use active dry yeast, but I am sure fast rising would still work as well, it would just decrease the rising time.
Hi! I am wondering if I can use my KitchenAid mixer with the same results?
Hi Rachel,
Yes! You just need to make sure your kitchen aid capacity can hold that many cups of flour, if not you may need to adjust the recipe by half. You still need to use your hand to distribute the shortening into the flour mixture though.
Good news-I had success with my kitchen aid 🙂 Thank you!
I was a school cook for awhile years ago. We use this dough for pig-in-a blanket.
Boil hotdogs and let them cool. After first rise punch down and roll out to 1/2 inch thickness. Cut into 1 inch wide strips. Use the strips to wrap hot dog around and around, end to end… Place on cooking sheet and let them rise again. Bake as directed for rolls. Hot dogs must be pre-cooked or rolls will be finished before hot dog..
Thanks for the idea Cathy, that sounds fun, I know my kids would love it!
if you have RA like I do and can’t kneed that dough anymore you can always use your bread machine to just mix and kneed the dough and take it out before it rises then just shape and let it rise and bake in your own oven. Let the machine do all the work. it works out great..
I have always wanted a bread maker! You are so smart to do it that way! Thanks for sharing!
I made these today to take to a friend that has had surgery along with some homemade chicken salad….oh my yummy! Thank you for sharing this recipe!
Yay! You’re welcome. I love hearing that Lisa! So glad you liked them!
Just wondering if you freeze the rolls after cooking them, do you thaw them before reheating? Also, how do you recommend reheating? Thanks!
Hi Karen,
Yes I freeze them after cooking and I thaw them before reheating. To reheat them I put them in the microwave briefly immediately before serving or I wrap them in foil and put them in a low temp oven (275 or 300) for a few minutes. Hope that helps.
Maria
Has anyone tried making these using gluten-free flour mixes?
For those of us who REMEMBER our school days and the lunchroom rolls we consumed by the ziliions, it would be a real treat to be able to try these….
Do I need to be the first to try? I have a few wonderful flour mixes that might work….
I love these rolls. I have made cinnamon rolls and regular rolls. My family likes for me to make pizza rolls with them. You cut up a block of mozzarella cheese into big chunks and add some pepperoni I usually put 3 pieces on either side of the cheese. Then I just pull the dough over the cheese and pepperoni until it covers all of the cheese. Put it seam side down and wait for the second rise. Cook them the same time you cook the rolls and they are done. We dip them in pizza sauce. Love them and so easy to make a batch.
THAT SOUND SO GOOD KATHY!!!! My kids would love it. Definitely trying that soon! Thanks for sharing!
I avoid shortening…..would butter work just as well to be added to the flour? Thanks.
I can’t say for sure, but I bet it would give you similar results. You could also try coconut oil. Good luck Sandra!
Hi, these sound so good! Going to try this weekend. If using coconut oil, how much? Melted or not before adding?
Hi Sandi,
I have never tried it with coconut oil myself, but soften or melt it before using and use the same amount as it calls for shortening , 1/4 cup. Good luck!
Could vegetable oil be used instead of shortening?
I think so Brenda. I have a Tortilla recipe that has you incorporate veg oil, by hand into the flour mixture. It would be worth a try.
Hi!
It’s me again…I’m sorry, I misread the ingredients and thought it said 3 tablespoons but it really says 2 tablespoons. My mistake… That is still more yeast than I’ve used before, so would still like to confirm the amount with you, if you don’t mind. So sorry again about the mixup and confusion! Thanks!
Hi Emily, Yes 2 tbsp + 1 1/2 tsp is correct. It is equivalent to about 3 of the little envelopes you can buy at the store. Thanks for checking, I am excited you are going to make these, you will love them!
Thank you so much for responding! I’m about to start making the right now, and I’m excited!!!
My dad’s mom used to make the lightest, fluffiest, tastiest rolls. We never got a recipe from her. My mom thought there was egg and a little sugar in there. Dad would take the rolls to country school with him and the teacher absolutely loved Grandma’s rolls too. Dad graduated in the mid-40’s. As I read your recipe and the descriptions, well, maybe your recipe sounds like something Grandma would have done. I would guess she used lard in place of shortening.
I can’t wait to try this out and get my mom and siblings opinion. Thanks much.
I hope they were just like Grandmas!
I was wondering about bread flour instead of all purpose? Is there a difference in it?
Hi Jennifer,
Here is some info I found about the difference all purpose vs bread flour makes in rolls. “Irene from King Arthur Flour explained it in dinner roll terms. Think about how you like your dinner rolls. Do you prefer your rolls soft and supple and tender? All-purpose flour is the way to go. If you prefer your rolls more firm, chewy, and substantial then bread flour would be your go-to bread baking flour.” Hope that helps.
Maria
Thanks for this Jennifer and Maria, that’s what I did wrong in my first try. I am a bread baker and always use King Arthur Bread Flour, so it never crossed my mind that there is a difference. Well, I say wrong because I was anticipating the lovely rolls in your photos which take me back to the day these were called Gramma Byer’s Buns and were tender and light and lovely! They taste yummy and are fine, just need to use the All Purpose next time. Btw, I also had to leave them in the over longer to double in size at 195, and I had to cook them about 30 minutes at 400 and they still did not really brown evenly either. But again, this was my first try and I used Bread Flour. Any other suggestions will be much appreciated. More stars next time, I’m sure. Cheers!
Made my second batch of these today for Thanksgiving dinner tomorrow. This time with King Arthur Organic All-Purpose flour. Still yummy and better, lighter, but still not like yours. They did not rise enough and are still more dense. Also, got to say at both points of kneading with my hands the dough was very sticky and stuck to my hands, had to scrape it off with a spatula even with flour on my hands. Advice would be much appreciated, please. Thanks!
Boy Christopher, I am sorry this recipe gave you problems. I an not sure what to tell you. If they seem sticky when kneading add a little more flour. Kneading can be tricky, I often have to scrape dough from my hands when I knead bread recipes by hand. Hope it goes better next time. …could also have to do with your elevation or humidity level in the air.
I made these today and while they were easy to make, were very soft and looked good, they don’t have a lot of taste. It seems like they’re lacking something.
Hi Nancye,
These are a very basic roll meant to be eaten with butter and/or jam, dipped in soup or gravy, or made into a sandwich with meat and cheese. If you feel they do not have enough flavor to stand alone you could add an extra 1/4 tsp of salt next time.
Maria
Afraid of yeast, but going to try these. Give me an idea how warm the water should be?
Hi Jennifer, Don’t be scared. 🙂 Yeast is your friend. The water should be similar to how warm you would make a bath for a baby. Good luck!
Making these today the dough is rising. Was reading all the comments pig in the blankets excited to try that with the next batch! This time its rolls and cinnamon rolls!
Just pulled the dinner rolls out of the oven and they are fantastic. I wanted to try the recipe prior to Thanksgiving to make sure I liked them. YES I LIKE THEM !!! I foresee making these ahead and freezing before baking to have fresh rolls any time we want them. The recipe was not difficult and exceeded all my expectations. Thank you so much for sharing the recipe and all the alternate ways of fixing them.
Yeah Barbara!
I am so glad you are happy with the results. I LOVE THESE ROLLS Too. The texture is exactly what I think a roll should be. Have a wonderful Thanksgiving and thank you for taking time to come back and let me know you made them.
Maria
found this recipe on Face book, and so tracked you down… I mean we are talking about bread, my favorite and it’s the rolls we had at school (which was a long time ago lol) talk about memories, so after reading all the great comments you got, I am fixing these for Thanksgiving dinner, Just wanted to say THANK YOU FOR SHARING…
🙂 you are so welcome Bonita! Have a great Thanksgiving!!!
Just tried this receipe today, the rolls were wonderful, my grandchildren LOVED them….Thank you so much… I plan to make them again thursday for Thanksgiving…
Awesome!
Hi Maria,
Do you think it would be okay to prepare the dough a day ahead of time, roll into balls, place on cookie sheet, and then cook the next day or I would I need to go ahead and freeze the dough balls?
Thanks and I can’t wait to try these out!
Beth
If you refridgerate it, it should be fine. Just work it out that it will be in the fridge for no more than 8-10 hours.
Hi Maria….
I admit I am not much of a bread maker but I saw this recipe and thought “hmm…I can make those.” Boy, was I wrong.
The recipe did not specify self rising flour or all purpose, so I used all purpose. Thought this was the thing to do since I was using yeast, NO….they came out awful. I think next weekend I will give this another try but use self rising this time….lol.
What are your thoughts on this?
Beverly, I am surprised these rolls didn’t turn out for you. I always use all-purpose flour. I hope your next try goes better.
I love your recipe — I was shocked by the number of rolls I got — I made one batch of the rolls and when I went to portion them I made 2″ balls (some bigger) and I wound up with 96 rolls. I was expecting 48. Maybe I made them too small? I don’t know. All I know is that I am going to have rolls for a while. I will probably freeze some of them and use them later. Good to know how many I got so that when I make them again, I can half the recipe.
Wow. Too funny. I wish I would get 98. maybe I make mine too big. 🙂 Freezing extra is a great plan and wonderful to pull out on busy days.
I added a touch of honey in mine… better than Hawaiian Sweet Rolls!
Sounds awesome, I will have to try that next time.
Thank you, thank you!!! I am making these for Thanksgiving lunch & I have never, ever made anything like this before!! You gave perfect instructions! Thanks so very much!!
You are so welcome. I hope they turned out great!
Can you cook these in an aluminum disposable pan? I heard the bottoms wouldn’t brown if I did.
yes
Maria,
The rolls are so beautiful.They are heavier than I expected and a little gummy. I did use 1/2 all purpose and 1/2 self rising flour. Could this have caused the problem?
Hmm, interesting. I have never had them come out doughy. But I have also never used self rising flour. I am not sure. It could also be that you need to space them a little further apart and cook them a little longer.
I discovered my water was bad for making breads, so I tried these as my first b4ead with spring water…. AWESOME! My husband says I have to make them once a week so he can take them for his breakfast sammies and his lunches. Its the first time that hes eaten 3 rolls at dinner and only 1 bowl of soup. They are perfect for sopping up the soup juice. And they freeze beautifully too. Next batch on its first rise now.
Awesome!!! I love it that your husband likes them so much.
I’ve got a kitchenaid stand mixer, would this be ok to use or is this recipe better used with hands?
Hi Lydia,
You need to check and see what the capacity is for your Kitchen aid. Mine is only supposed to hold 11 cups, so If I make this recipe in it, I have to half it. I usually just do it by hand in a big bowl so I can have enough rolls to freeze some for later. But to answer your questions, yes, the kitchen aid will work fine you just might have to cut the recipe in half.
Maria
I have 23 yrs in food service in the school district where I graduated. We use oil instead of shortening and use the mixer. If you pinch off a baseball size portion of the dough with oiled hands, tuck it under until it is smooth on the top, make a circle with your thumb and forefinger and give it a push through to the size you want and squeeze the bottom with your thumb and forefinger then twist the ball off you don’t have all that pinching together on the bottom. You should get 3 rolls out of the baseball size portion. Once you get good at it you can pinch a dozen rolls in like 5 mins. Hope everyone has a Merry Christmas and a Happy New Year!!
Thanks for the tip Angelia, I will have to give that a try, what a good idea!
At 76 with arthritis, my Kitchen Aid mixer is such a gift. Follow recipe directions and let it do the work. I will add a nice amount of bench flour before turning the dough out of the bowl. Coat dough, which should be soft, liberly with this extra flour. Form into ball and put into large plastic bowl and let rise till double. Punch down and form into balls, wait until double in size, and bake. Do cover with cloth kept especially for this use, washing between each use. LOL.
I live in a retirement community and love to share these with my friends.
Thank you for these tips when using a mixer! I am so glad you love this recipe! It is the best!
Hi,
Thanks for sharing this recipe! I would like to try the cinnamon rolls, but first I have a question. It is unclear to me what stage the 1/2 batch of roll dough is at for the cinnamon rolls. I am wanting to do the overnight version. Do I need to let it rise til doubled, punch down then proceed with cinnamon roll recipe? Or mix dough, no rise, roll into rectangle, add cinnamon, etc the shape into my cinnamon rolls, and refrigerate? Thank you!
I usually do it after it doubles in size, but now you have me thinking…I think it might work a little better if you just let it rise a little the first time, not quite doubling and then roll it out and make into rolls and then refrigerate.
How do u u mk cinnamon rolls?
Maria, When My Mom Passed Away The Recipe Went With Her .Her Home Roll’s Was The Bomb I’m So Glad You Put This Recipe On Here I’m Going To Try It Then Let You Know How I Liked Them. Hope They Taste Like Mom’s Did.
I hope they taste just like your moms did too. I know how it is to loose a recipe with someone. My Grandma made the best Divinity and I just can’t figure out her secret….I wish I would have taken the time to learn it from her before she passed away.
I made these yesterday and…WOW, this is the best, easiest, tastiest recipe I have ever found for making rolls and cinnamon rolls. The texture is amazing. I will no longer be in search for a yeast roll recipe and will trash all of others I’ve tried, for this is the one I’ve been searching for. So glad for Pinterest and finding your recipe…finally! Now, off to eat another cinnamon roll or a roll with a slice of ham, or maybe both!
That’s what I’m talking about HAL!!! I am so glad you found this recipe and love it as much as I do, I feel the same way. The Texture really is perfect! Thank you so much for coming back to let me know you love the recipe!
Take Care!
Maria
Recipe for cinnamon rolls, please
Here is the link to the cinnamon roll recipe. https://reallifedinner.com/lunch-lady-cafeteria-cinnamon-rolls-tmh/
I’ve been looking for a go to dinner roll recipe and this one sounds great! Very interested in trying it but this is a huge recipe so I’d like to start with a half portion first. Do you literally 1/2 all the measurements? Your feedback would be greatly appreciated, just want to make sure it’s done right. Thank you in advance.
Yes, Camille, cutting each ingredient exactly in half will still give you great rolls. This recipe is great! You’ll love it!
If you make these rolls and go exactly by the directions you won’t be sorry. We made some similar to these one year and instead of balling up one roll we put three smaller rolled up balls together in a muffin pan that had been sprayed with cooking spray. When baked thet were like restaurant style ‘Parker House’ rolls if you know what I mean. Haven’t done them in years but may try it for Christmas
Hello girlfriend. I made these rolls and they were so good. I used bread flour the first time. Then I read all the comments and to use APF. So I did and they were 100% better. Made half recipe, and made cinnamon rolls as well. I am diabetic, but oh how my neighbors love me when I make these. Reminds me of how much love our lady’s at school put into making the yeast rolls. Also of my Nannie, I loved going to her house and the smell of yeast, oh my I could hardly wait until they were done. I’ll stop babbling and say thanks again for this wonderful recipe. Merry Christmas and God Bless.
Fay, you are so sweet. I am so glad you love this recipe. I do too. I have made them three times since Thanksgiving and plan to make them for Christmas Dinner tomorrow. It is a great recipe and totally reminds me of the lunch ladies at my school too. Merry Christmas!
Hello can I omit the eggs and replace with some buttermilk?
I have never tired that, replacing it with plain yogurt might be a better option.
can you make into loaves instead?
Hi Shirley, I have never tried it so I don’t know. If you end up trying it, let me know how they turn out.
Fantastic, thank you for the recipe!
You’re welcome. 🙂
I’m looking forward to making these rolls. My husband and I have our kids and grand kids at our home for Thanksgiving, Christmas and Easter meals. My plan is to make them ahead, freeze and reheat later. Of course, I will want to try the cinnamon rolls for our breakfast. Thank you for sharing this recipe.
Sounds like a great plan Barbara. Having family together for the holidays is the best!!!
Even easier way to measure out equal portions: roll your dough out into a long rope, cut in half then cut each half into equal pieces. I find this easier to get rolls that are all the same size..
So good! This recipe made so much, which is great. It fed 6 farm guys plus my 4 kids! They were so easy to make. Great recipe!
Thank you, glad everyone liked them. 🙂
How many rolls will fit into a 9x 13 pan?
Hi Linda, I usually put 20-24 in a 9×13.
I do 16, line the pyrex with parchement. They come out big and tall and fluffy the way I remember them,
These rolls were a huge hit today! Tomorrow we’re having cinnamon rolls with the left over dough. My fiancé said they’re as good as his moms. High praise! ?❤️
Wow! That is a great compliment. Thank you! So glad you all liked them.
Have you tried freezing balls of dough? Do they hold up well? I would like to make some of these dinner rolls I don’t always have time make a new batch every time I want some dinner rolls.
I haven’t tried that, but I like to cook the rolls and then freeze them in portions that are family would use at one meal. Works great. I just take them out a couple hours before we are going to eat and they taste great.
Just read through the whole recipe and noticed something that my Dad, a professional Baker, taught me was a NO NO! He said you never add your salt to the liquid that goes into the yeast mixture, because it kills the yeast. I learned that you should always add it to the flour. Just a thought! I’ve never done it any other way, so I don’t know if it would have that big of an effect. I am baking these as we speak and getting ready to make the cinnamon rolls from 1/2 of the dough. The smell is incredible!
Hi Sue, It isn’t best practice to add salt to the yeast mixture, but it doesn’t kill the yeast. I worked at a pizza place where we made the dough from scratch and they always taught us to put the salt in with the yeast mixture. I think they did this mostly for convenience purposes so we wouldn’t have to use the measuring scale twice. In my own baking I go back and forth with adding salt to the yeast mixture and not adding it to the yeast mixture…I’ve never noticed a difference in the final product.
I don’t buy shortening. Can I use butter?
Yes, that will work fine.
These look great! I cant wait to give them a try!
Thanks Ashtyn!
I just got these out of the oven and they are awesome
Great! Hopefully you had butter and jam handy. I wish I had one right now!
Thank you for a wonderful recipe. Best rolls ever! I also made the cinnamon rolls, which were delicious as well. Only change I would make is a personal preference of cream cheese frosting for those. Both are my go to recipes from now on!
Great! I am so glad you like the recipe Veronica!
Thank you! my husband and I want to try these.
Ok, I found this recipe through a facebook group for recipes. I have always been horrible at making homemade bread – just never seems to turn out correctly. Most of my adult life, I just bought the frozen bread doughs in the grocery store, and made those into rolls or loaves, or even pizza crust – whatever bready thing I needed.
BUT I moved overseas, and cannot get frozen bread dough here. So I have experiemented over and over, never quite getting the taste I want, or the rise.
WELL, I have found a new favorite – THIS RECIPE! I just made it, and before baking, I made all the small rolls, but I put about 2/3 in the freezer (I got about 40 altogether) before baking, to try and see if they will work like the frozen dough I used to buy. Also, there probably would have been more, but my son wanted a “giant” roll, so I left one big blob bigger and put into a small Pyrex to bake.
I baked 18 rolls + the giant ….less than 15 minutes after they are out of the oven, the giant bun was half gone and there are only 8 little buns left! And there are only 3 of us here!
Thanks for this great recipe!
Haha! That is awesome Lana, so glad you found the recipe and that your family loves it. Good luck with your cooking adventures overseas!
Maria – I have been on a mission to recreate our local lunchroom rolls from the 1970s and 80s in Tuscaloosa, Alabama – which were also the basis for the cinnamon rolls. I made YOUR recipe a couple of years ago for Thanksgiving – and they were EXCELLENT. WELL – I finally was able to locate the recipe from an old lunchroom manager for the exact recipe which was used in our school system in the 1970s and 1980s. I’d like to share it with you – because while it contains essentially the same ingredients – the amounts on some items are different. I am looking forward to making this newfound recipe of our local rolls – and see what type of difference there may be in YOURS. I am going to quarter the recipe to 50. This is the recipe for 200: 10 pounds flour, 14oz. Sugar, 10oz. Dry Milk, 4oz. Salt, 8oz. Dry Eggs, 3oz. Yeast-SAF, 1 Pound 12oz. Shortening, 3qts. Water. With water in mixing bowl – add shortening and all dry ingredients adding SAF Yeast last. Mix on low until all ingredients are dampened then on high for 10 minutes. Let rise until double. Shape into rolls and pan. Let rise again. Bake at 350 for 10 to minutes. ************ I thought one thing interesting about this – is that it doesn’t call for the element of mixing the yeast with the water and some sugar and letting it activate for a few minutes. This is just mixing it all together. I wonder how this may affect the roll making process???? Thanks for sharing!
This recipe is so full proof. Pulled it out again, cause quarantine! I always follow the suggestion of using half the dough for cinnamon rolls. Thank you so much. It’s my go to roll recipe for all holidays.
Absolutely love hearing this Charly, I made them this week too. I was feeling lazy and didn’t cut shortening into the flour this time, I just put a couple tablespoons of canola oil in the egg/yeast mixture and they still came out amazing!
Hi..
If i dn hv milk can i use water …
Cn i put butter no so much bcos nw i dn hv so much butter. If i dn wan put butter can i put some oil …
Thnks
You can definitely try those things! Let me know how they turn out!
I just pulled a pan of these out of the oven and they are so incredible soft! The dough was really easy to work with, too. My other pan is in the oven now, following your cinnamon roll recipe. We’re all excited to try them for dessert tonight! #febgiveaway
So glad you gave this recipe a try, I feel like it’s one everyone needs in there back pocket. Not overly complicated but yields rolls with such a nice texture.
I don’t use shortening, can I use butter instead and not change the texture?
Yes, it should be fine.
Hi there! I love this recipe and have made it for my five boys for years now. Recently, I moved from Texas to Utah, and every time I make them, they fall in the middle. Also, I just got a grain mill and would love to make them with that flour.
Any suggestions or fixes would be appreciated!
Thanks!
Karen
Hi Karen, I am sorry it has taken me so long to respond. I am so glad you like the rolls. That is strange that they fall in the middle since your move. Maybe they need more or less time to rise before baking, You could experiment with that. If you choose to use your fresh ground flour, I recommend using only up to half fresh ground and the rest all-purpose or they will not be as fluffy. Good luck!
Do you use glass or plastic containers
I usually use plastic.
These rolls are great! Thanks for the recipe and the great details on all the steps to make them. Really helped with shaping the rolls.
You are welcome Claudia, I am so glad you liked them and found the instructions helpful. YAY!
I made both your cafeteria Rolls and your cafeteria cinnamon Rolls and they are absolutely the best I’ve ever made! Thank you!
Yay! This makes me soooo happy Anita! I’m so glad you gave them a try!
Looks like an excellent recipe. Since you sound like you like a good shortcut, one thing I do when I make rolls, is for the last rise (once they are individual rolls and in the baking pan), I don’t specifically let them rise. I just start them in a cold oven and cook them an extra 5 minutes or so. That gives them a chance to do their last rise while the oven heats up.
Thank you Susan! I LOVE THAT TIP!!!!
Maria, I don’t know if my previous post went through earlier. I precisely halved this recipe and the dough was so sticky that I could not touch it – almost thick soup. I have been looking for a recipe that was close to the elementary hot rolls that I remember. I don’t know what could have happened. I wanted to make these for family gathering.
Hi Nancy, that is very strange that the dough was so sticky. Many things can contribute to sticky dough, Weather and humidity being one. If that happens again, add 1/2 cup of flour at a time until it is a better consistency.
First made these rolls today after a failed copycat recipe of Ryan’s (old buffet restaurant chain) dinner rolls left us all disappointed for Thanksgiving dinner. Everybody loved them.
The only complaint we had about the rolls was they seemed to have too much flour in them, which made them very dense. Next time I plan to start with 8 cups, then gradually add the remaining 2 cups, or until the dough is no longer sticky, and see how that goes.
A few tips:
* If you’re using baking sheets, line them with parchment paper. This will prevent them from sticking and burning. It will also make cleanup easier.
* Adjust your oven’s racks to the middle-highest and middle-lowest positions (second and fourth in most ovens). Place a pan of rolls (if you end up with more than one pan) on each rack, bake for half the time recommended, rotate and switch the pans, then bake for the second half of the recommended time.
* Brush the rolls with some melted butter (plain, garlic, or honey) after removing them from the oven.
So glad they were a hit, Thanks for the tips!
I went to high school at Cleveland HS in St Louis Missouri. We had Cafeteria Ladies who made rolls everyday. I’ve been searching for a recipe close to what we had in HS. I lived on 2 rolls with 2 pats of real butter for 20 cents everyday for 4 years.
I’m so glad you found this recipe! You are going to love them, it will take you right back in time! Rolls were my favorite part of school lunch too!
Can I use cooking oil instead of shortening?
Thanks! Making these tomorrow.
Yes, so sorry I didn’t see this earlier, hope you loved the rolls!
My grandson is allergic to egg white. Would it work to use just the yolk in the recipe?
Yes, that should work fine!
These were the highlight of my elementary years, and to be able to make them anytime I want is truly AMAZING, and at the same time, EXTREMELY dangerous. Thank you from the bottom of my ❤️, and around these newly formed hips 😁. They come out perfect every time.
Lol! You are so welcome and I totally understand. I have to restrain from making them more often…especially as cinnamon rolls..
These are BY FAR the best buns I have ever made!! And my family LOVES them! I made all of the buns for my grandsons graduation party using this recipe and made them big enough for hamburger buns. SO good!!
Awesome Polly! I love hearing that so much!
This is an excellent recipe. I proofed the yeast, with sugar and water and added all the other ingredients (all at once, without cutting in, melting, whipping, kneading) in a food processor and processed until it formed a nice ball. Fast and easy!
What a great idea! So glad you like the recipe! Thanks for taking time to leave a comment!
I was a lunch lady and we put oatmeal flour in our rolls. I would substitute about 3 – 3 1/2 cups of flour with oatmeal flour. Just put rolled oats in your blender or food processor. The oat flour adds great flavor.
Yum! I can’t wait to try that Joanne. Thank you for sharing!
When you made cinnamon rolls, did you have all the ingredients including the yeast? Thanx for your help
Yes, all the ingredients, including the yeast. Maria made a full batch of the dough, and then split the dough in half. One half was made into rolls, and the other half was made into cinnamon rolls.
This recipe was amazing, everyone loved the rolls at Thanksgiving. I wanted a fluffy recipe and this one was so easy. Excited to have cinnamon rolls tomorrow morning.
Thank you so much! I’m so glad you liked it.
Not even close to school rolls. I’ve been searching for the recipe for years to no avail. These tasted like store bought rolls. I wish people would stop putting recipes about how they taste “just as good as” or
” like they had in school”. These rolls are okay, but NOT schoolhouse rolls like we had as kids.
Hi I’m loving your recipe reminds me of my childhood. Is the cooking time different if I use a glass 9×13 vs a metal pan?
I find I need to slightly increase the cooking time when I use a glass pan. They should only need a little bit longer, I would check them every 2 minutes past the posted cooking time until they are starting to golden brown.