
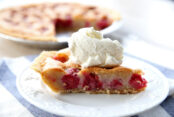
I LOVE cherry pie, especially my Mom’s Cherry Pie! It is SOOOO good! She uses red tart cherries, and it is perfection with a little scoop of vanilla ice cream on top! YUM!
I made a few pies yesterday for Thanksgiving, and I just had to share this recipe with you. Cherry pie lovers, unite!

Other Recipes from Mom
- Mom’s Bester Dinner Rolls
- Classic Meatloaf
- Mom’s Best Peanut Brittle Recipe
- Sunday Pot Roast
- Homemade Ranch Dressing
- Mom’s Baked Soda Cracker Chicken
The cherries can be a little difficult to find. They are usually in the canned fruit section of the grocery store instead of the pie filling area of the grocery store. I was really happy to see that they carry them seasonally at Aldi now. These are the cherries that make this pie so amazing!

how to make mom’s cherry pie
- Preheat oven to 400 degrees.
- In a saucepan, combine half of the sugar and corn starch.
- Next, add cherry juice and stir constantly over medium heat until it becomes thick and bubbly.
- Remove from heat and add remaining sugar, food coloring, and almond extract. Mix well.
- Pour filling into the bottom of the pie crust.
- Don’t forget to dollop the butter on the top of the filling before you seal on the top crust.
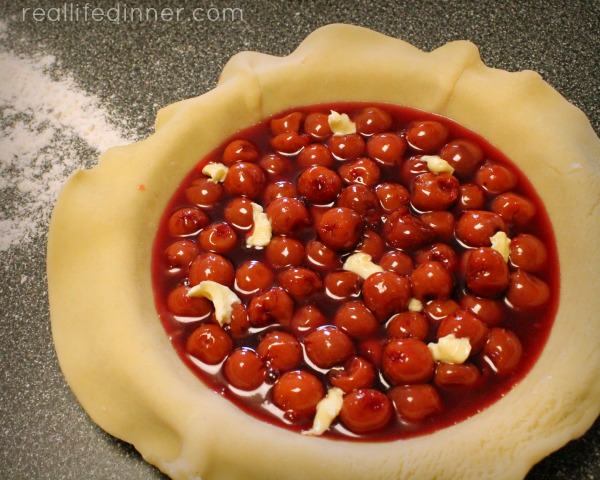
- Add top crust, seal, and crimp edges. Put a few slits in top crust to allow steam to escape.
- Bake for 45-55 minutes. I cover the edges with foil to prevent them from getting too dark.
- Cool pie several hours to allow filling to thicken before slicing.
- Serve with vanilla ice cream or fresh whipping cream.
- Enjoy!
Tips for making Mom’s Cherry Pie
- Instead of making your own pie crust, buy frozen pie crusts to make this pie come together faster.
- My pie tins are small, so I don’t double the filling. If you have large or deep dish pie tins, you will definitely want to double it.
- You can leave the food coloring out of the recipe. The filling will not be as bright red if you do.
- Don’t forget to dollop the butter on the top of the filling before you seal on the top crust.
- If you can’t find the canned Oregon pitted red tart cherries, another brand of pitted red tart cherries will work fine in this recipe.
- Cover the edges of the pie with aluminium foil or a pie shield while baking, so that the crust does not get too brown.
- You can warm each slice in microwave for 20 seconds when serving if you prefer warm cherry pie.
- Serve with vanilla ice cream or homemade whipping cream.
baker’s tools:
Pies for the Holidays


Mom's Cherry Pie
The cherries can be difficult to find. I found them in the canned fruit section at my grocery store. I put a picture above in the post.
Author: Back of Cherry Can
Recipe type: Pie
Serves: 8
Ingredients
- 1 (15 ounce) can Red Tart Cherries, drained, reserve juice
- ¼ cup plus 2 tbsp cherry juice
- 1½ tbsp corn starch
- ¾ cup sugar
- ⅛ tsp red food coloring
- ⅛ tsp almond extract
- Dough for a 2-crust pie
Instructions
- Preheat oven to 400 degrees.
- In a saucepan, combine half of the sugar and corn starch.
- Next, add cherry juice and stir constantly over medium heat until it becomes thick and bubbly.
- Remove from heat and add remaining sugar, food coloring, and almond extract. Mix well.
- Pour filling into the bottom of the pie crust. Dot small pieces of butter on top of the filling before adding top crust.
- Add top crust, seal, and crimp edges. Put a few slits in top crust to allow steam to escape.
- Bake for 45-55 minutes. I cover the edges with foil to prevent them from getting too dark.
- Cool pie several hours to allow filling to thicken before slicing.
- You can warm each slice in microwave for 20 seconds when serving if you prefer warm pie.
- Serve with vanilla ice cream or fresh whipping cream.
- Enjoy!


Leave a Comment