
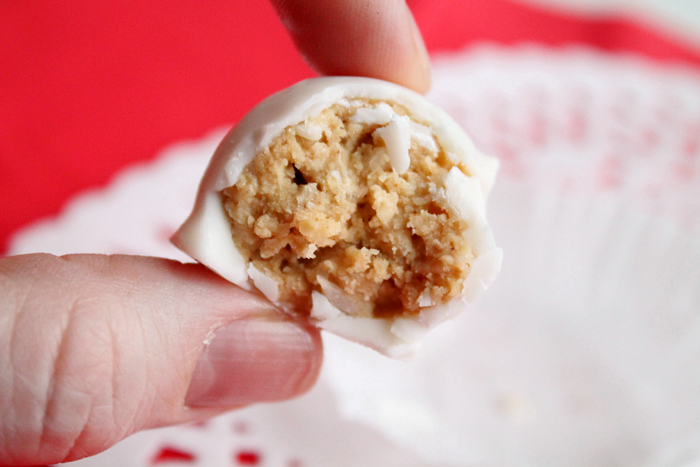
The pictures show them dipped in white chocolate. They taste great in white chocolate, but they are also delicious in milk or dark chocolate. Even melted butterscotch chips give a coating that is surprisingly complementary and delicious. You can choose one coating to dip them in or a couple of different ones. I usually melt some white and chocolate almond bark and some butterscotch chips so we can have a variety.
 The batch makes anywhere from 60-100 peanut butter balls depending on how big you choose to make them. I usually do tablespoon-size balls and get about 85.
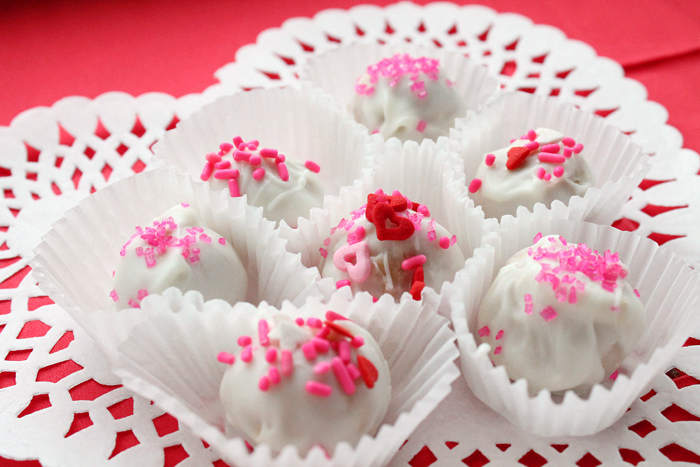
I like to add sprinkles that make them festive for whatever holiday is near. I obviously made these around Valentine’s Day, but you can use red and green sprinkles at Christmas time. They make a nice gift for teachers and neighbors. If you are going to add sprinkles, you have to move kind of quickly because the chocolate sets up fast when you are dipping frozen peanut butter balls.
It can be a little intense for one person, so I usually enlist a kid to sprinkle as I go along dipping. It can be a fun family activity. My kids think it’s the best thing in the world to be on sprinkle duty!
Candies for Various Occasions
- Rebecca’s Amazing Caramels
- Butter Pecan Fudge
- Old Fashioned Cherry Mash Chocolates
- Easy Chocolate Cream Cheese Truffles
- Hershey Bar Fudge
- Mom’s Best Peanut Brittle
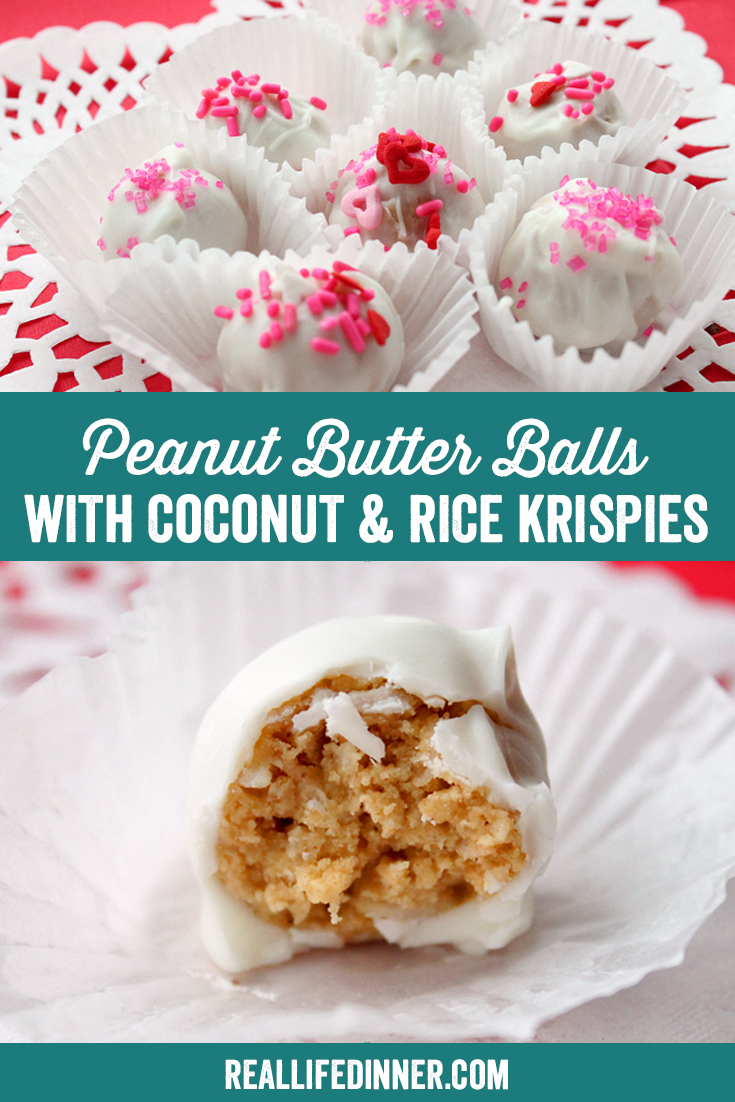
how to make peanut butter balls with coconut & Rice Krispies
- In a medium-sized mixing bowl, combine the powdered sugar, softened butter, peanut butter, coconut, and Rice Krispies. Mix well.
- Cover a large cookie sheet with parchment paper or wax paper.
- Using a small cookie scoop or a regular spoon, form mixture into tbsp-sized balls. Roll it carefully in your hands to make smooth circles. If it is sticking to your hands, try freezing it for a few minutes before forming into balls.
- Place formed balls an inch apart on the prepared cookie sheet. Once all the balls are formed, place entire cookie sheet in the freezer for 30-60 minutes.
- Right before you pull them out to dip, prepare your chocolate or almond bark for dipping.
- Use small glass dishes to melt your chocolate or almond bark in the microwave. Remember to add a tsp of canola or vegetable oil if you are using chocolate chips. This will help them not seize.
- Microwave in short increments and stir in between until chocolate is melted.
- Use a fork or toothpick to dip each chocolate. Gently shake off excess chocolate and place carefully back on the prepared cookie sheet that the other balls are on.
- If you want to add sprinkles, add them now before the chocolate sets.
- Let dipped peanut butter balls set. I like to move each one to a mini-cupcake liner as pictured.
- Store in an airtight container at room temperature. They can also be kept in the fridge if desired.
- Peanut butter balls should stay good for up to 2 weeks.
This recipe is extra special to me because I got it from a sweet little old lady when we lived in Arkansas. I am so sad that I can’t remember her name. It’s been over ten years ago and my memory is terrible.
She is the same person who gave me the Mexican Casserole recipe that I love and adore and I know many of you do, too. She was a great cook and such a sweetheart. She would make the Mexican Casserole every month when we had a linger-longer lunch at church. She was also famous for these Peanut Butter Balls. She called them Bon Bons and did a demonstration on how to make them at one of our church ladies’ meetings.
I love how living in so many different places during the beginning of our marriage brought so many amazing people into my life and so many amazing recipes! It brings me so much happiness every time I make a recipe that was given to me by someone I love that I no longer live near. It is such a blessing in my life to have had the opportunity to live in so many different areas of the country! I can’t imagine things any other way!
Which reminds me, I would love, love, love to get some of your favorite recipes. Nothing makes me happier than a new delicious recipe…I’m pretty sure this means I need to get a life, but none-the-less, it’s my truth!!! Leave them in the comments or shoot me an email at reallifedinner@gmail.com. I would be ecstatic to get your favorites!
Tips for making Peanut Butter Balls with Coconut & Rice Krispies
- I find a tablespoon of the mixture to be the perfect size for the peanut butter balls, but you can make them bigger or smaller if you prefer.
- You can use creamy peanut butter in this recipe, but I like the crunchy texture the little chunks of peanuts add.
- Before dipping the peanut butter balls in the chocolates, put them in the freezer for at least 30 minutes. Freezing them like this helps to keep their shape better when they hit the warm chocolate, and it also helps the chocolate set up faster. Line a cookie sheet with parchment paper, roll them out on it, and stick the whole thing in the freezer. Use the same cookie sheet and parchment paper to put them on to dry after dipping them.
- I mentioned that I use almond bark for dipping. I love using almond bark because it is so easy to work with, and I have never ever had it seize up on me in the melting process.
- If you use chocolate chips or butterscotch chips, add a little canola or vegetable oil or shortening while you are melting them in the microwave and do it in small time increments. Using a double boiler on the stove is another option, and as long as you are careful and don’t heat it too far, you won’t have a problem with the chocolate seizing.
- You can add Paraffin Wax to the chocolate to give it a thicker, shell feeling, but I never do. If you have some or want to try it, add 1 tsp of melted paraffin wax into your melted chocolate. (Just make sure it’s food-grade paraffin wax.)
- If you want to add sprinkles, add them before the chocolate sets. It is nice to have a second pair of hands to help with sprinkles. It’s a great job for kids.

More simple candies


- 2 cups powdered sugar
- ½ cup softened butter
- 1 cup chunky peanut butter
- 1 cup shredded coconut
- 2 cups Rice Krispies Cereal
- Chocolate chips or Almond Bark for dipping. White Chocolate, Milk Chocolate, Dark Chocolate, or Butterscotch chips.
- In a medium-sized mixing bowl, combine the powdered sugar, softened butter, peanut butter, coconut, and Rice Krispies. Mix well.
- Cover a large cookie sheet with parchment paper or wax paper.
- Using a small cookie scoop or a regular spoon, form mixture into tbsp-sized balls. Roll it carefully in your hands to make smooth circles. If it is sticking to your hands, try freezing it for a few minutes before forming into balls.
- Place formed balls an inch apart on the prepared cookie sheet. Once all the balls are formed, place entire cookie sheet in the freezer for 30-60 minutes.
- Right before you pull them out to dip, prepare the chocolate or almond bark for dipping. Use small glass dishes to melt your chocolate or almond bark in the microwave. Remember to add a tsp of canola or vegetable oil if you are using chocolate chips. This will help them not seize. Microwave in short increments and stir in between until chocolate is melted.
- Use a fork or toothpick to dip each chocolate. Gently shake off excess chocolate and place carefully back on the prepared cookie sheet that the other balls are on.
- If you want to add sprinkles, add them now before the chocolate sets.
- Let dipped peanut butter balls set. I like to move each one to a mini-cupcake liner as pictured.
- Store in an airtight container at room temperature. They can also be kept in the fridge if desired. Peanut butter balls should stay good for up to 2 weeks.
More delicious Peanut Butter Recipes


Leave a Comment