
My friend, Rebecca, is as big of a foodie as I am…always looking for the best recipe for everything. A couple of summers ago, we stopped at her house in Missouri on our drive from Maryland to Utah. Even though it was July and caramels are usually more of a Christmas treat, she made me these caramels before I left because she knew I would love them. Now that is a true friend!
She was right. They were fantastic and have since become my go-to recipe…which is saying something because I’ve been making these Merry Widow Caramels since I was a wee one at my mother’s knee. Don’t get me wrong! I still love Merry Widow Caramels, too, but the dark Karo Syrup in this recipe adds an even deeper caramel flavor that is just SOOOO GOOD! I can’t wait for you to try them!
 Making homemade candy can seem intimidating, but once you make Rebecca’s Amazing Caramels once, you will see that as long as you have good directions, a candy thermometer, and my trick for testing the caramel in a cup of cold water, you will be a pro in no time!
 More fantastic Homemade Candy Recipes
- Mom’s Best Peanut Brittle
- Classic Chocolate Fudge
- Caramel Corn Puffs
- Homemade Chocolate with Toffee and Almonds
- Old Fashioned Cherry Mash Chocolates
- Crazy Good Mint Fudge
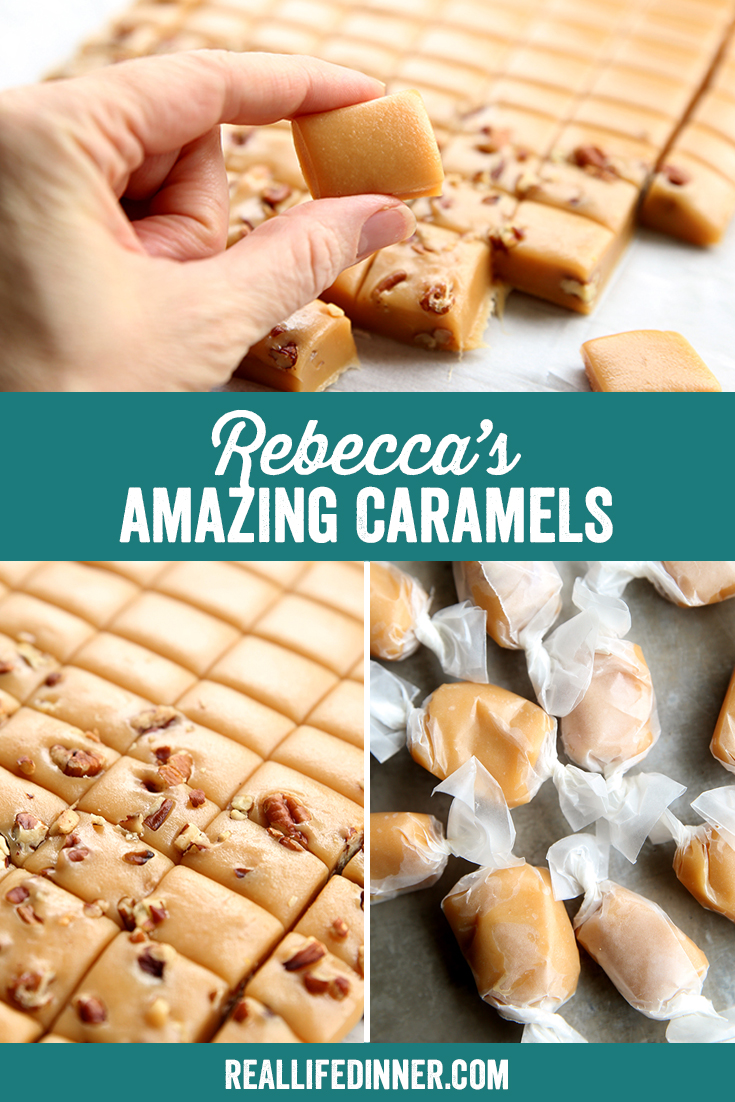
 Step-by-step pictures on how to make Rebecca’s Amazing Caramels
 Tips for Making Homemade Caramels
- Always use room temperature ingredients.
- Prep the dish you plan to pour them into and put everything you will need close to the stovetop. Caramels need careful babysitting and almost constant stirring, so you don’t want to have to leave them to find what you need.
- Make sure your candy thermometer doesn’t touch the bottom of the pan. It will give an inaccurate reading if it is touching the bottom of the hot pan.
- Keep 2-3 small cups of cold water next to you while cooking the caramels. Dropping a spoonful of caramel into the cold water helps give you an idea of how far along the caramel is in the cooking process. You reach in the water and try to form it into a ball. If you can form it into a soft ball, that is an indication that it is ready or close to ready. Remember you are looking for the texture of how you want your end product to be.
- As soon as your caramel reaches the right temperature, immediately pull it off the heat, quickly stir in the vanilla, and then pour it into the prepared dish.
- When pouring it into the dish, do not scrape the bottom and sides of the pot into the poured caramel. Quickly get as much as you can out, but keep in mind that the little bit of caramel that has stuck to the sides and bottom has cooked a little longer than the caramel that has been poured out. This doesn’t seem like that big of a deal, but it kind of is. That caramel will have a tougher texture and if added to the rest you’ve poured, it will give the caramel an inconsistency. I choose to scrape that part out onto a small buttered plate and eat it myself, or if I’m feeling nice, I share it with my kids.
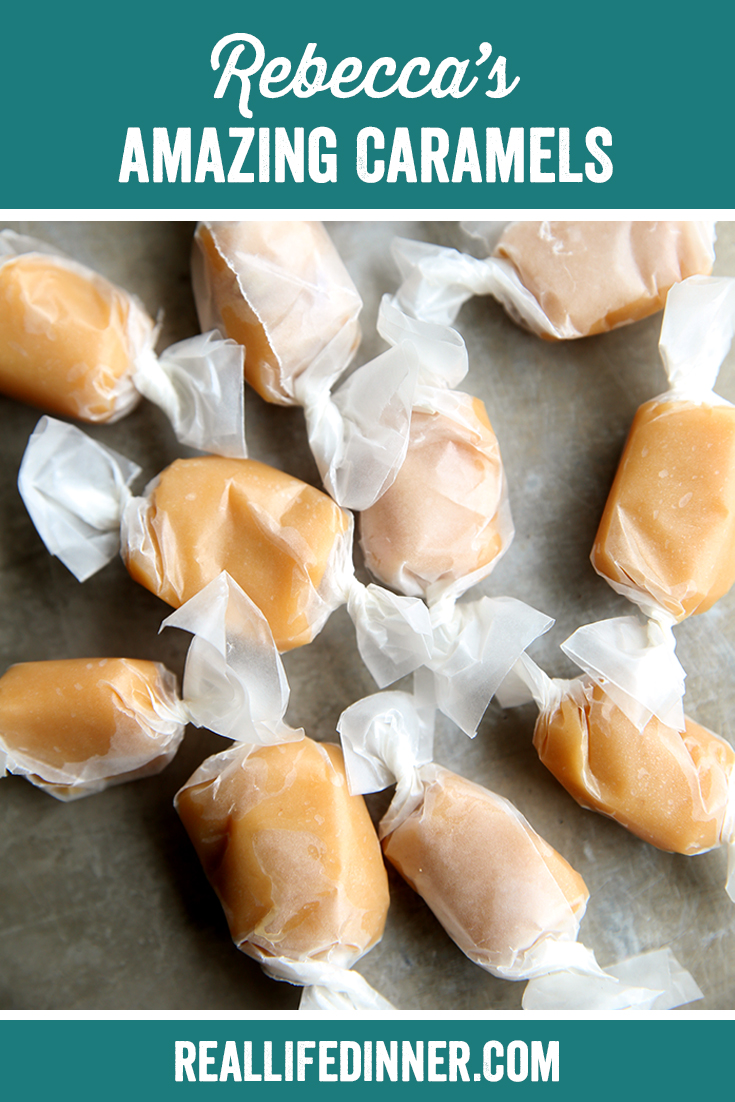
- Let the caramels cool completely before cutting and wrapping. I like to wrap them in wax paper.
- Occasionally, I undercook my batch of caramels, and they are too soft to hold in your hand or wrap. When that happens, I turn them into Caramel Rice Crispies or Chewy Caramel Rice Crispy Treats with Chocolate Chips.
cook’s tools:
Perfect cookies for your cookie exchange


- 1 cup butter, room temperature, no substitutions
- 2 cups white sugar
- 1½ cups dark Karo Syrup
- 2 cups heavy whipping cream
- pinch of salt
- 2 tsp vanilla
- chopped pecans, optional
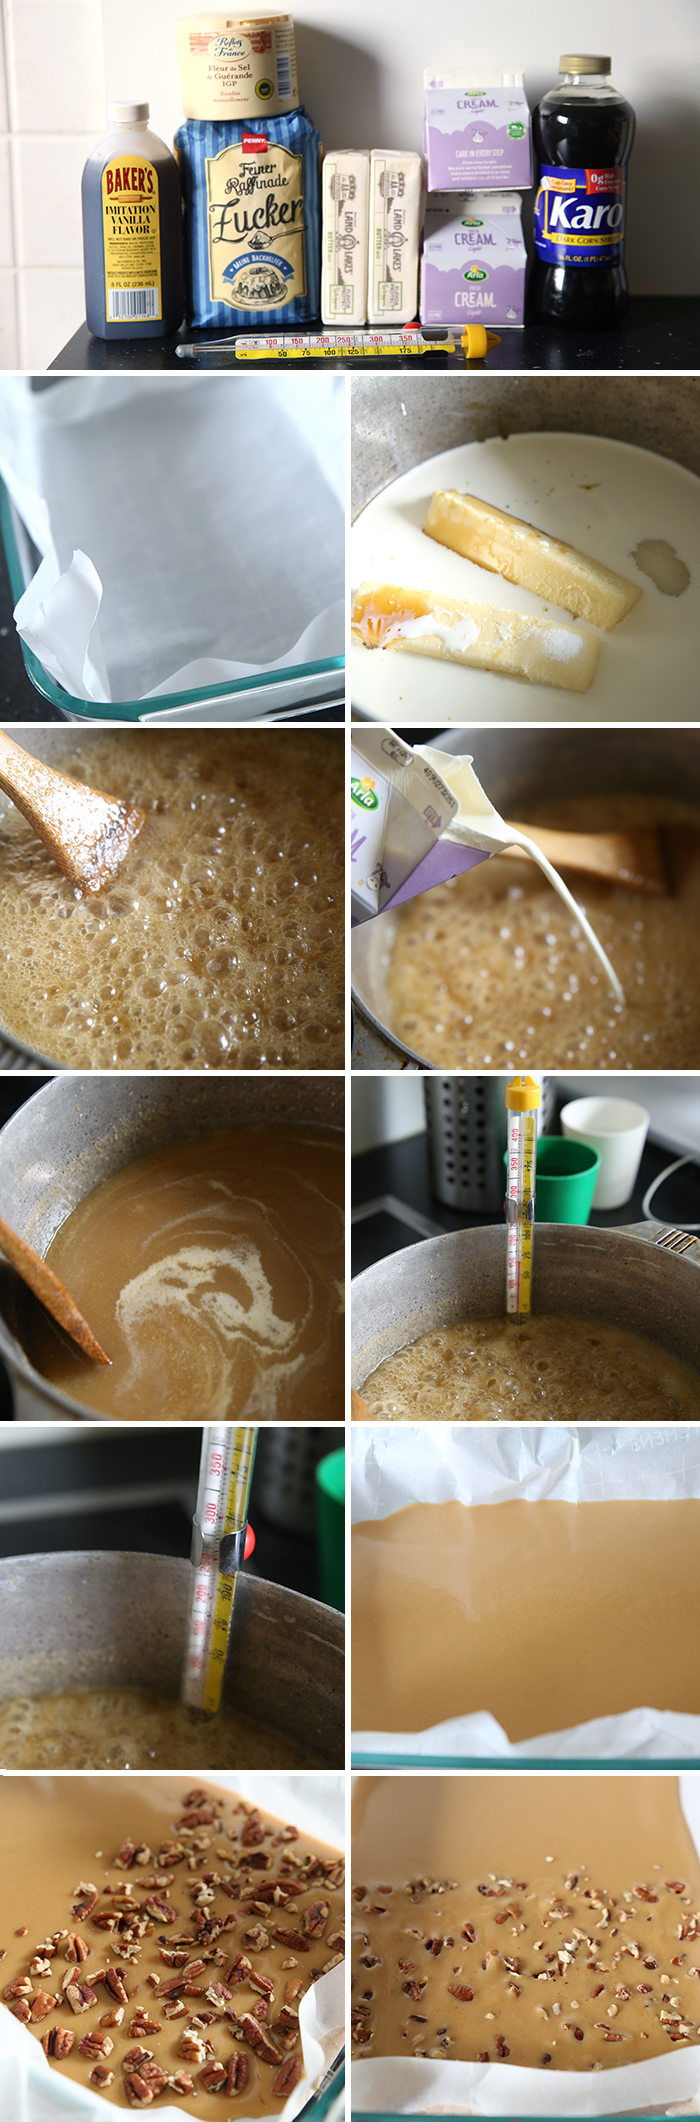
- Line a 9x13 glass dish with parchment paper or butter it well. Prep vanilla and 2-3 cups of cold water near you by the stovetop.
- Heat 1 cup butter, 2 cups sugar, 1½ cups karo syrup, and 1 cup of heavy cream in a large pot with a thick bottom. I suggest using a wooden or bamboo spoon for stirring. I like ones that are slanted like this to reach every part of the pan.
- Bring to a rolling boil over medium-high heat. Boil hard, stirring constantly for 5 minutes. (Set a timer.)
- After five minutes, slowly add the remaining 1 cup of heavy cream. Continue to boil, stirring constantly. Cook until firm ball stage or until 234 degrees on a candy thermometer. *See tips above for how to use a candy thermometer correctly.
- When thermometer is getting close to 234 degrees, use a cup of cold water to test the caramel. Drop a small amount in the cup and use your fingers to see if you can form it into a ball. You want the ball to be slightly firm and resemble the firmness you want your finished caramel to have.
- When caramel reaches 234 degrees or firm ball stage with water test, QUICKLY remove from the heat, add vanilla, stir, and pour into the prepared 9x13 dish.
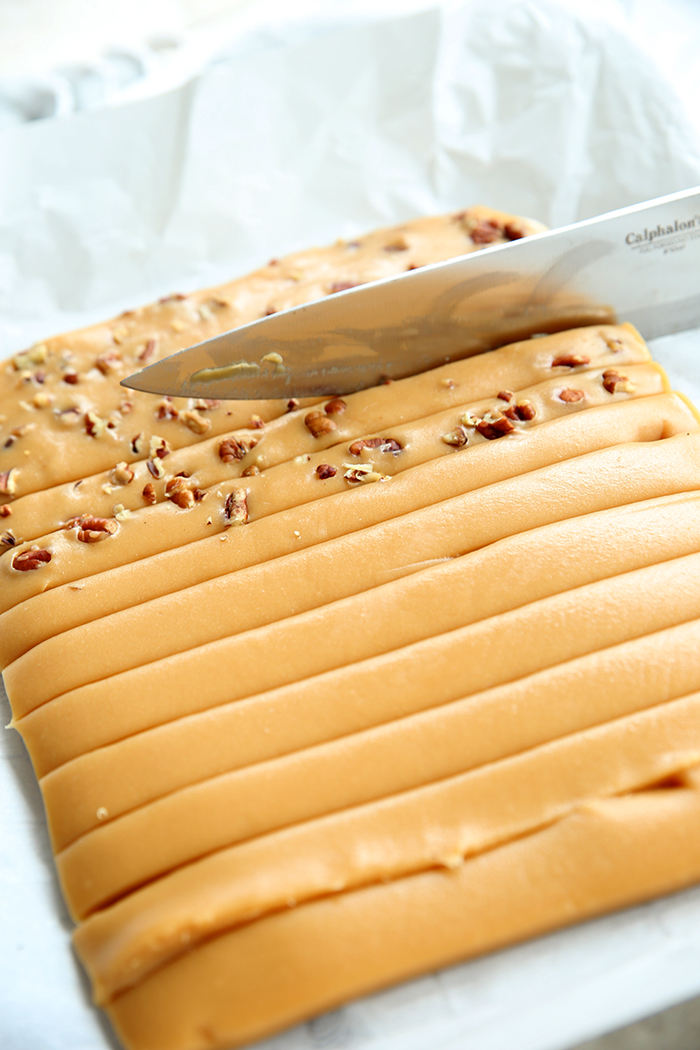
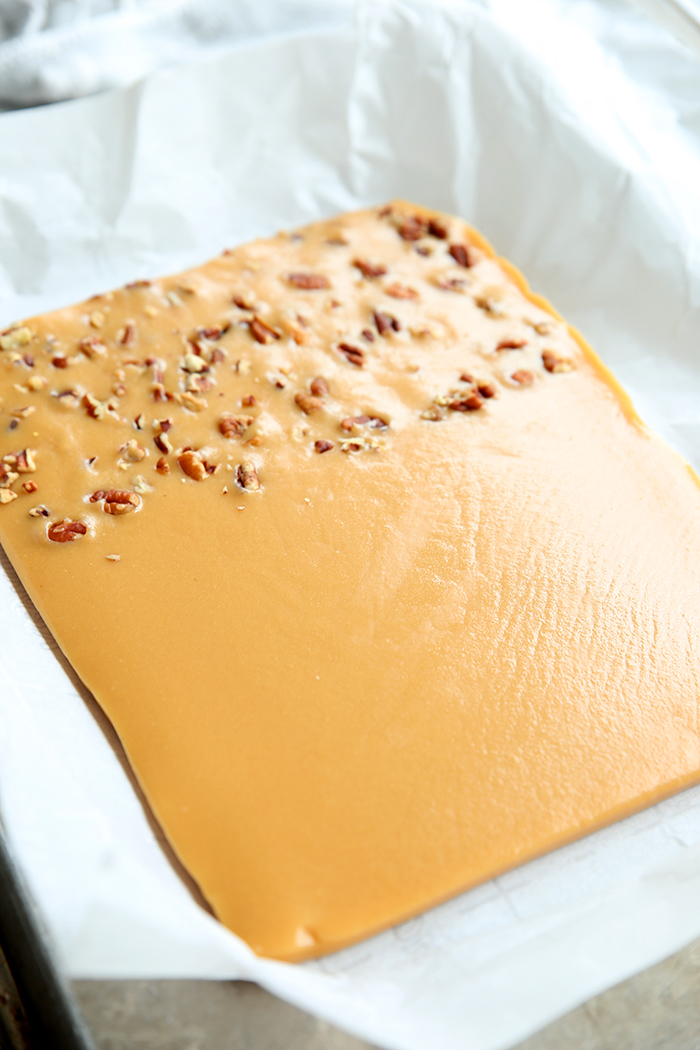
- If you want to add nuts, put them in the entire batch. You can mix them in when you add the vanilla. If you only want nuts in half, sprinkle them on half after you pour it, and use a spoon or butter knife to press them into the caramel.
- Let caramels cool completely and overnight, if possible. Once caramels are completely cool, you can cut them into 1-inch pieces and wrap them in wax paper.
Christmas Dinner Favorites


What happens if they turn out too hard? Is there a way to use them?
I’ve heard you can put them back in the pan with a little water, and as soon as it melts together again, put it in the pan….but I’ve never tried it.
These are the best
#December giveaway